Showing posts with label bridesmaids. Show all posts

Friday, June 27, 2014

Wedding Recap #1 - The Flowers

Hey guys, remember me?  I have a feeling that the majority of those 19 followers have long since gotten married and abandoned the wedding blog scene, but I finally have the motivation to do some recaps while off work for the summer, so let's roll with it. 

If you remember, and if you don't, I decided to have the florist put together the corsages and boutonnieres and left the remaining burden on myself.  I ordered 200 white roses, 150 white carnations and 150 white pompons/cushion/mums from Sam's Club and needed to make 5 bouquets and 8 centerpieces.  I had previously tried the whole shipping-flowers-thing with my high school students for prom earlier that year with great success and the savings was pretty big ($300 total for all those flowers)!

Once the flowers arrive at your door, they need to hydrate for at least a day before you want to start working with them so I had them set for delivery on Thursday and they appeared on my doorstep, perfectly on time, like this:
 
 
Once inside, they come packaged together in clumps, usually in two layers to help protect the buds:
 Carnations
 
 Mums
 
Roses
 
 
They have you cut the stems at the bottom and then hydrate/feed them in buckets of water.  I had previously gone to Wal-Mart and bought a few buckets, but the bakery also gave me some for free, you just have to ask!
And there you have 500 flowers in my bathroom!
 
I let them hydrate over night and then come Friday morning we started assembling everything.  My mom was there to help me and she started working on the centerpieces.
Photo Credit:  Grant Watkins Photography
 
I started with my bouquet and then worked my way through the bridesmaids'.  The hardest part was definitely putting the ribbon on there, but Adam surprisingly ended up being very talented at this and became head ribbon-on-bouquet man:
Photo Credit:  Grant Watkins Photography
And the bridesmaids' slightly smaller versions, with peacock blue ribbon instead.
Photo Credit:  Grant Watkins Photography
 
All in all I definitely over-ordered, but I was more afraid of not having enough flowers and having to scramble at the last minute and that just wasn't worth it! We ended up having over a bucket of mums left and then I put the extra roses in a large vase on the cake table (which the bridesmaids ended up stealing some to make me a bouquet to use in the toss (sealed with electrical tape instead of ribbon though). 
Photo Credit:  Grant Watkins Photography
 We'll talk about cake and the bouquet toss later...
Photo Credit:  Grant Watkins Photography
 
After the wedding, Adam's mom ended up taking the leftover flowers since we couldn't really enjoy them on the honeymoon and all worked out splendidly. Considering that the florist quoted me $300 on just the centerpieces alone, I was very proud that I was able to squeeze the bouquets in that price and also have the stamp of my handiwork on one more element. 
 
Anyone else attempt/are thinking about the DIY flower route, do share!  Any readers still out there...? Stop by and say hi!


Monday, July 8, 2013

The Gifting

Sounds like a movie title about aliens taking over your mind, eh?

But rather, let's talk about wedding party/family gifts. Note:  I am a terrible blogger when it comes to this post as the only pictures that I have are from the bridesmaids' gifts.  Sorry.

For our parents, we wanted to do something sentimental and also something that they could use.
1. For my mom/step-dad, we gave them tickets to the local Discovery Center (they've been wanting to go together) and also a plate that I wrote on with Sharpie and baked in the oven.  A picture would be great here, but it said:
"For all you've done,
For all you've been.
For all you are,
Thank you"
 
It also had some parenting words written on the edges like love, guidance, caring, etc. and then had
our names and the wedding date at the bottom.  My parents have several plates on display in their house similar to this.  When my brother and I were both born, they ordered some with our birth information on it and they also received one as a wedding gift when they got married.
 
2.  For my dad/step-mom, we got them an Omaha Steaks gift certificate and a picture frame.  The frame had three 4x6 openings so I put a picture of my dad and I when I was little in the first one, a poem about Dads in the second one and drew a picture of stick people in the third one saying, "Lindsy-Dad wedding picture goes here." My parents divorced when I was three, so I imagine that Dad doesn't have a whole lot of pictures of me from when I was little. He really seemed to like it and mentioned how long it had been since he had even seen that picture.
 
3. For Adam's mom, we also made a plate for her and then got her a gift certificiate for a massage.  We struggled with what to get her, but it seemed to go over well.
 
4.  For Adam's Dad, we also had a rough time.  Adam's dad doesn't have the greatest living situation, so chances are, to get him something nice, he either doesn't have a place to put it or it will get lost and broken. There is one wall where he hangs all of his pictures and things so we wanted to give him something that could be put up there.  We went to hobby lobby and bought a wood slab.  We then found a Dad poem that was more fitting for a son and wrote it on there/decorated it with a fine-tipped sharpie.  We bought some mounting hardware and slapped that on the back.  We also got him a book because he loves to read (Game of Thrones, of course!).
 
For the groomsmen and ushers
Adam and I went to Wal-mart and bought large beer mugs.  Adam tried to engrave the mugs with etching cream, but he's not as OCD as me and didn't want to take the time to do them like I did for the Will you be my bridesmaid gifts.  He did etch their first initial into the bottom of the glass free-hand.  We then went to the liquor store and bought a variety of mini bottles of alcohol and then filled the mugs with tissue paper and liquor. 
For my 17-year-old brother, however, we got him a bottle of sweet tea and attached three $10 Chipotle gift cards to it.  He wasn't disappointed.
 
And for the bridesmaids (finally, pictures!)
I bought 5 tote bags off Amazon for about $5 each (with shipping).  I wanted to make them a goody bag with some different supplies for the wedding. 
 
I bought some iron-on transfer paper and made a design that I wanted to add to the front.  I decided to use their first initial and use a variety of shades of blue so that each girl had a slightly different color.
I did have to reverse the image so that it would iron on correctly!
 
I followed the instructions on the iron-on paper (melting the tote bag a little!), and we sucessfully had 4 bridesmaids tote bags:
I filled their bags with flip-flops from David's Bridal that matched their dresses, a make-up bag with deodorant, lotion and chapstick, their bracelets and necklaces that I made them for the wedding day, some granola bars and chocolate to help cure their hunger for the day and a couple mini-bottles of alcohol as well (just in case!). I also told the girls that I would pay for their hair updo's or or any other salon service of equal price (since only two bridesmaids did get their hair done) as the rest of my gift to them.
 
So there are our gifts!  I am so glad that we only had 4 bridesmaids/groomsmen because they can certainly add up!  Having a few extra sets of parents didn't help either, but by making some of the gifts ourselves, it made them more personal but also helped us save some money!
 
What did you do for wedding party gifts?  Any cool ideas for me to regret missing out on?


Monday, May 6, 2013

The Bouquet Details

If you recall, we are using all white flowers in our wedding:  carnations, roses and hydrangea.

For my bridesmaids bouquets, I've decided to just use carnations and flowers.  Here is my inspiration:

I've been doing some shopping to complete all the elements.  I wanted to have blue ribbon to wrap around the stems and I thought it would be cute to attach a charm to each of the bouquets for each of the different girls.

Just like the ties, finding ribbon in the color peacock was rather difficult.  Here in Manhattan, we have Hobby Lobby and JoAnn, but after combing the ribbon aisles, I could only find, you guessed it, navy blue or turquoise.  I figured that the ribbon needs to match a little better since the bouquet will be held directly up to the dresses, thus I commenced the search for peacock-colored ribbon.  I looked at Michael's when I went to Topeka without any luck as well.  So I turned to my friend, Google, and they pointed me to this website:  ribbonbazaar.com.  I found a color called "peacock" and decided to give it a try.  You can request samples, so request I sure did.

After receiving my samples, I put it to the test:
I bought a 50-yard spool of 7/8" Peacock double-faced satin ribbon for $7.00, but they have a minimum order of $10, so they just charged me an extra $3.  Shipping was $6.20.  I would have thought that $16.20 for a roll of ribbon was crazy-talk if I was at Hobby Lobby, but desperate times calls for matching ribbon. 

For my own bouquet, I have some left over white ribbon that I am going to use.  My bouquet will also have hydrangeas and be a tad bit bigger, but they will all be pretty similar.

Also, for each of my bridesmaids, I was wanting to add a charm on each of their bouquets to help distinguish between everyone's flowers.  I found an Etsy shop that had initial charms, SaintsFlowers, and bought an initial charm for each of the girls.  The total was $4.50 (including shipping) and they shipped quickly, despite coming from Canada and I'm super happy with my purchase!

As for my own bouquet, I want to add a charm to it also.  My grandma passed away three years ago this summer and so I'm going to ask my grandpa for something of hers from her massive jewelry collection so I can carry it with me.  She was an amazing woman, having lived during World War II in Nazi, Germany, came to the United States, and made a successful life for herself and her family.  She is really the first person in my family that has passed away and the first person that I've felt a significant loss for, so it's really important to have a piece of her with me because I know she would've loved to have been there.

With that being said, bouquet supplies are almost ready to go.  We just have to get a bit closer so that I can order the flowers from Sam's Club.  I can't wait!

Tuesday, February 19, 2013

Not So Matchy-Matchy

When I asked my "ladies" to be my bridesmaids back in August, I wanted to let them know right away what I was thinking about when it came to picking out their dresses.  I had given some thought to what I wanted their dresses to look like:
  1. Short length - My dress isn't overly elegant and we are having a summer wedding, so it made sense to me to go with short dresses
  2. Peacock color - the infamous peacock that makes everyone ask me if we are using peacock feathers in our wedding...no.  It's also the color that doesn't show up correctly on the computer and changes from navy blue to teal in the blink of an eye.  I still love it, but I'm still sad that barely anything matches it unless you order it from David's Bridal directly.
  3. Fabric - no preference
  4. Style - no preference
So based on my impartiality of the style/material (and the fact that I figured we couldn't get all 4 of them together at once to decide), I went ahead and gave them the open choice on the style of the dresses.  As long as it was short and Peacock, I was perfectly content with that.  

The Bridesmaid Dress Journey:
Maid of Honor N, Bridesmaid H and I went to David's Bridal right before New Year's and it was a big failure.  They hadn't gotten their Spring dresses in, despite sending out their Spring catalogs a month earlier.  We tried again at the beginning of February and had much more luck.  Bridesmaid H picked out a chiffon halter dress (with room to expand for her preggo belly), while MOH N picked out a chiffon sweetheart neckline dress with cap sleeves.  

Bridesmaid L said that she would be going to her local DB that next week, so I sent her a quick email about what H and N had picked out, but told her that if she liked one of those to not hesitate to get it also.  She also picked the chiffon halter dress like Bridesmaid H.

By then, we had 3 chiffon dresses.  Bridesmaid V, since she was the last to get to DB, got an ultimatum and it was "I would really like you to find a chiffon dress."  I'm pretty tough when it comes to ultimatums.  Thus, we went last Sunday, and...she got a chiffon dress!    

So, the bridesmaids have dresses, and here they are:

I just randomly organized them, well with MOH N on the far right like she would be at the altar.  I haven't decided how to arrange them exactly, we might do height.  Since Bridesmaids H & L have dresses that are a bit longer, it might be something we just have to wait and see about and decide on what looks best.  Unfortunately though, that would be on the wedding day.  I also thought that it might look best with them two on the far left and then the two shorter dresses on the right.  What do YOU think?  Suggestions suggested!

MOH N actually is going to wear the sleeves like straps.  Clearly in this picture they were altered perfectly for this girl's shoulders, but I personally like them as straps anyway!  They are all going to wear black heels of some sort.

So there is my attempt at mismatched bridesmaids dresses.  I think it will turn out great, but I was kind of worried to begin with.  I promised Adam that it would look good, although I wasn't 100% sure at first!  I was concerned about having all different lengths and fabrics together and also about 3 people liking the same dress and having a random 4th (unless it was the MOH).  But as you can see, it all turned out okay! Hooray!

Sunday, February 10, 2013

Lindsy Plays Florist

I took Monday off from work and had some wedding-related errands that I wanted to run.  My main goal was to get some flowers and with them accomplish a couple of things:

  1. Practice making bouquets
  2. Decide on whether or not we would have flowers at the altar
  3. Practice assembling the floral centerpieces
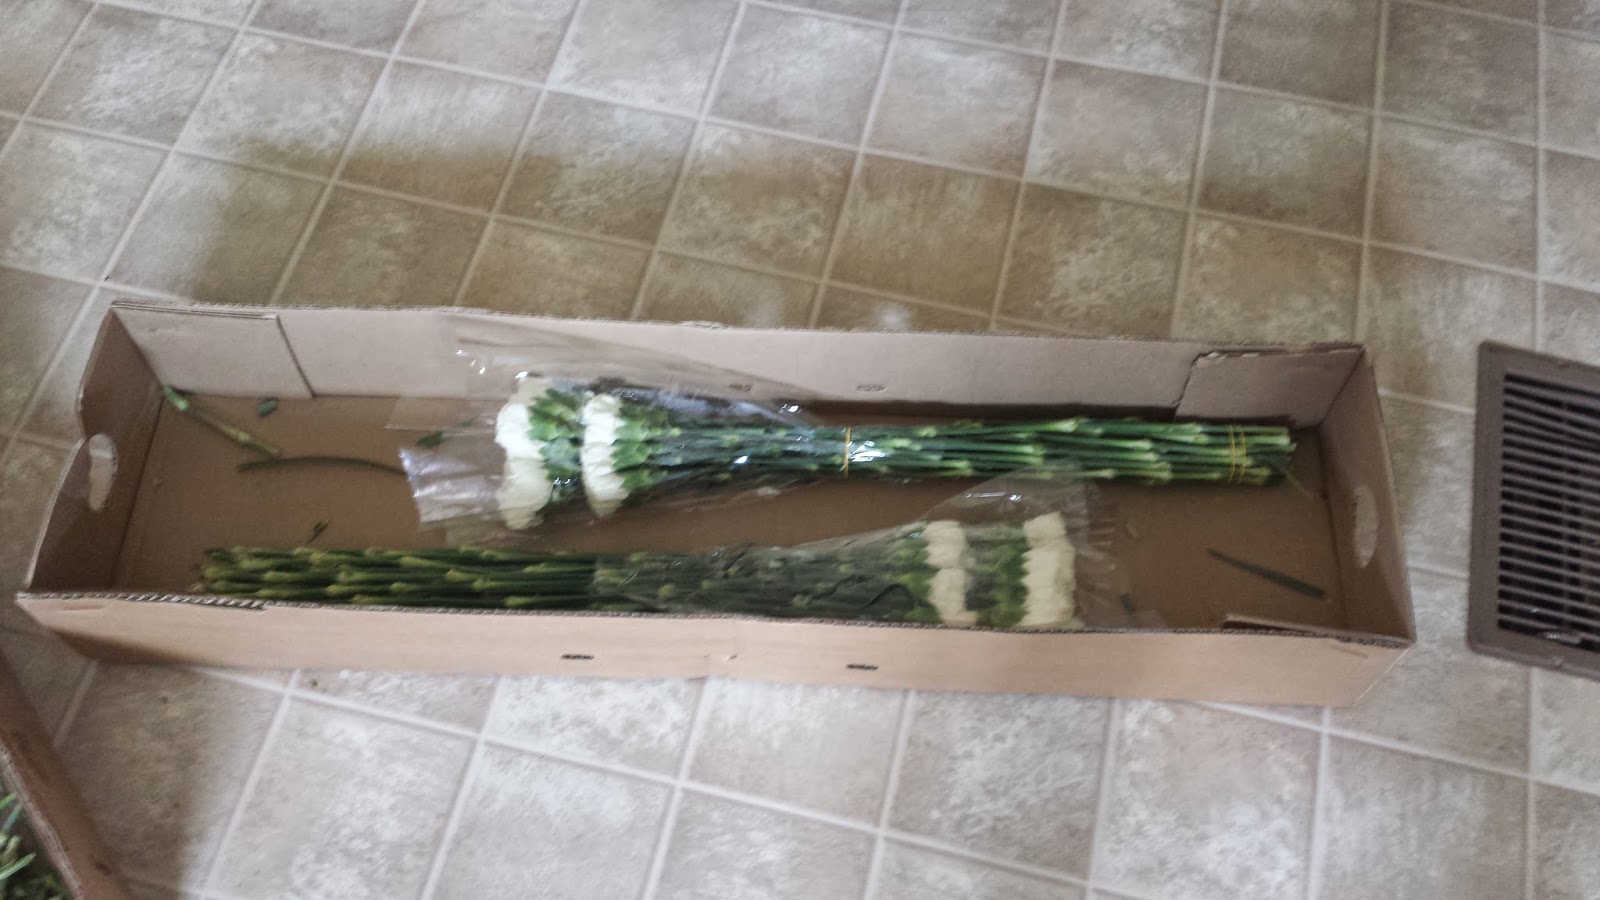
Kistner's, the floral shop that we I chose to do our wedding bouts and corsages, always has $1 roses.  I grabbed a dozen of those and then 8 carnations @ $1.50 for a pre-tax total of $24.00.  They either come in red or assorted, so I picked assorted, and the carnations that just came in were either yellow or peach.  I went with peach.  

Now, our wedding flowers are going to be all white, but I didn't want to pay $3 a rose to get all white when all I was trying to do was some practice.  And honestly, I think $25 is the most I've ever spent on flowers.

Practice Making Bouquets:
I played around with the assortment of flowers to do the bridesmaids bouquets and came up with several numbers to help me decide how many flowers to order (sorry, no pictures...blogger fail):
  • small bouquet = 4 roses / 3 carnations
  • medium bouquet = 8 roses / 5 carnations
  • large bouquet = 12 roses / 6-7 carnations
  • extra large bouquet = 16 roses / 9 carnations
What surprised me the most was that I overestimated the number of carnations needed. I figured it would be equal, but the carnations seem to expand more.  ...And, based off my initial trial, making the bouquets seems like it will be fairly easy (yay!).  I started with 3 flowers in my hand and then just started adding flowers to the outside.  I'll have to maneuver floral tape when I actually do the bouquets, but doing a little practice has given me the confidence to know that it won't be a complete failure!

I plan to order enough flowers to do a large bouquet for each bridesmaid.  I might have to adjust the numbers depending on the flowers, but I plan on ordering some extras anyway.  As for my bouquet, I will have a couple of hydrangea blooms in there too, but I didn't feel like buying them.  I hear they are pretty delicate flowers when it comes to keeping them hydrated, but hopefully they are just as easy to manipulate!


Decide on Whether or Not to Have Flowers at the Altar
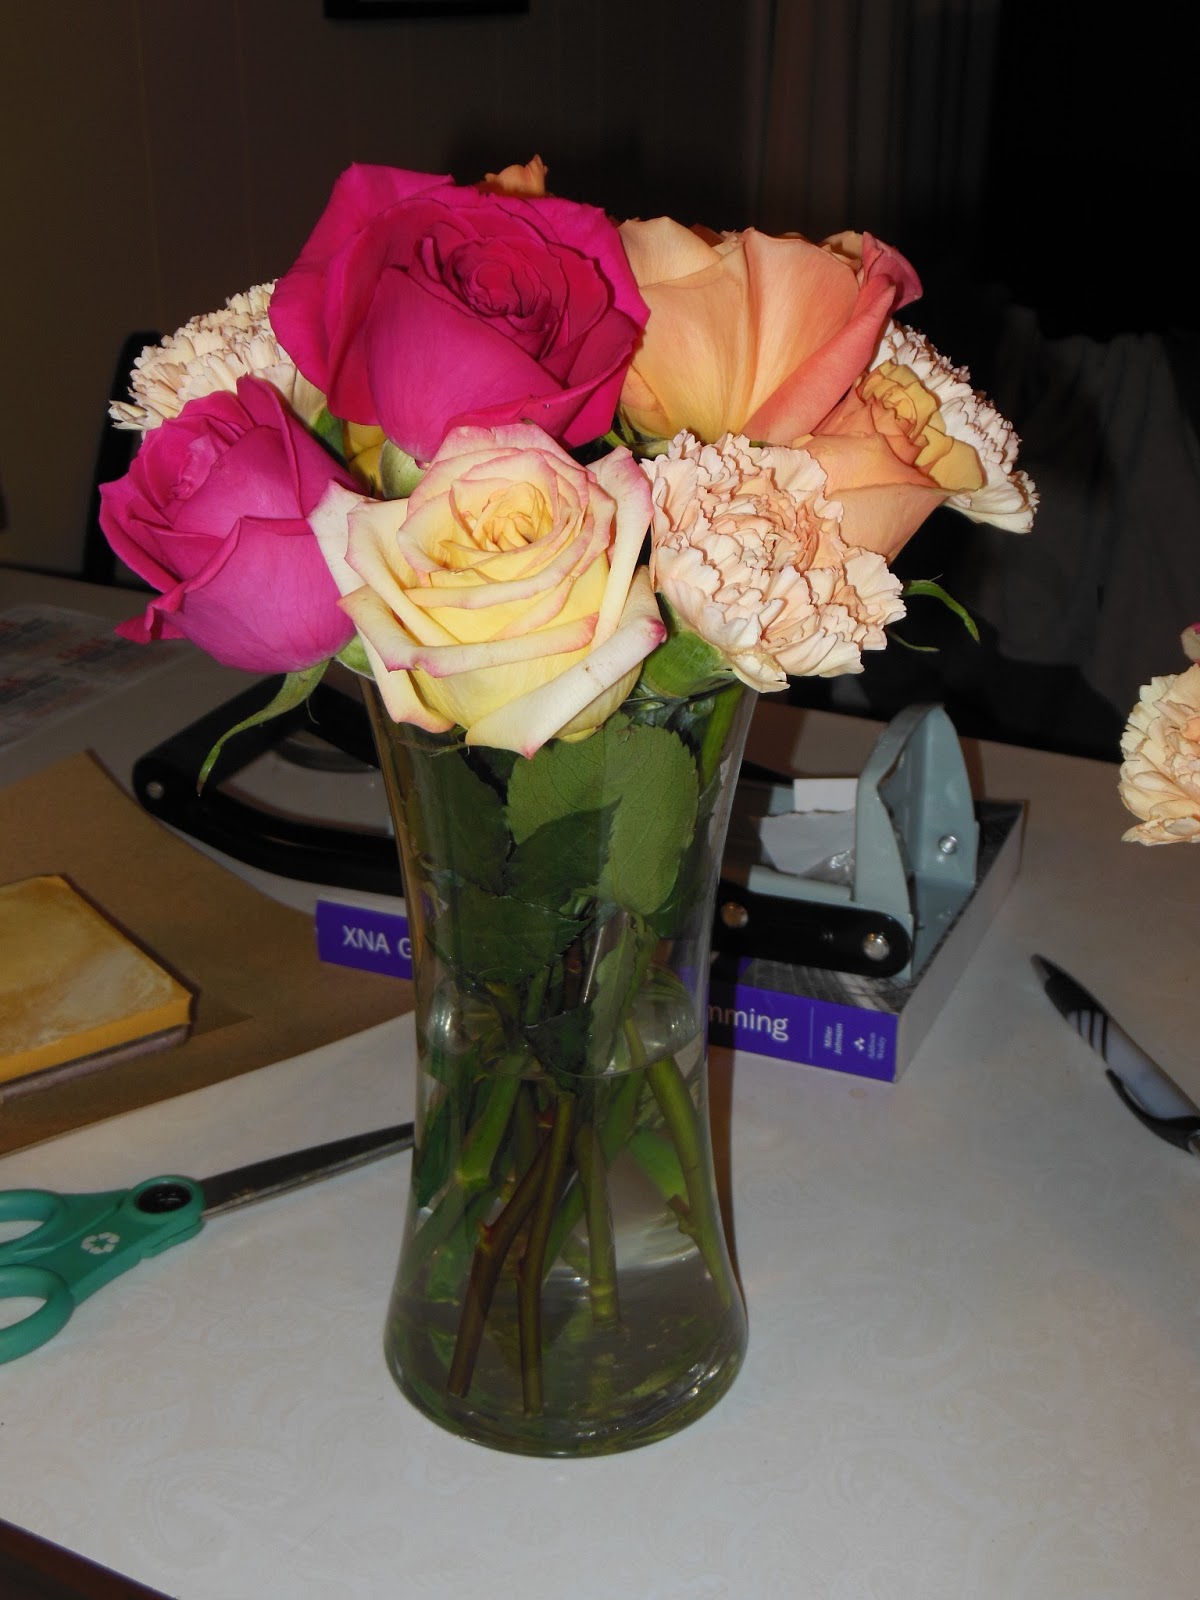
I then took the flowers and arranged them into two vases.  

My original vision for the altar was to have two flower arrangements on the sides and then our unity candle in the middle.  After talking to the first florist, she strongly recommended using tall flowers for the altar arrangements because the height of ceiling and the giant stone wall will dwarf the flowers.  While I am not a big fan of some of the typically tall flowers (and didn't want to pay $50 per arrangement), I didn't quite believe her.  I told her that I would check it out and get back to her.  

If you remember, or if not, this is our church:
See the altar up there, hiding behind the piano?

Well, she was right.  Adam and I took the flowers and the unity candle set up to the church last night and they looked sooooo tiny!  Adam and I agreed that it looked much better to be flower-less than to have dinky looking flowers up there at the altar.  So there's a few extra flowers that we don't have to order!


Practice Assembling the Floral Centerpieces
As I've said before, we are having two types of centerpieces:  a 7-piece candle set and then the H-Bowls with flowers.  I'm still hard at work on the candles, but will share them soon!  

The floral centerpieces are going to have the same flowers as my bouquet, a combination of roses, carnations and hydrangea.  Thus, what a perfect opportunity we have to practice these as well!

Based on the shape of the bowl, I figured I might have a hard time arranging the flowers.  The flowers were going to need to be short enough to fit in the bowl, but they might be top-heavy because there would be barely any stem to balance the weight out.  Here's a refresher picture:

I recalled seeing this picture from Martha Stewart/Pinterest awhile back that I thought might help me out:

While I knew that I didn't want to use tape on the bowls (because I wanted the flowers to sit deeper in the glass), it did give me an idea:  chicken wire!

I bought a roll of wire at the hardware store for about $6 and made two templates to try.  I just "traced" my pyrex lids.  The blue one is 6" in diameter and the red one is about 7.5" in diameter.   The red one sat pretty high up on the bowl, so I chose the smaller, blue template.


Gloves are highly recommended!  After cutting two of these, my hands were sore.  After I finished the other 8 (with gloves), I found this pretty little thing:

And then we start arranging!  The wire grating moves around a bit at first, so I started by doing the outside edge and then working my way in.  The stems ended up being only 2-3 inches tall to fit in the bowls (and most certainly top-heavy).   I ended up using a total of 16 flowers:  9 roses and 7 carnations.  Since I will be using hydrangea also, my numbers will end up being different, but at least this way I know the maximum number of flowers that I am going to need!

And the finished product:

I did add some flower petals to the mirror.  Like I've said before, I don't know if I'll dye them blue or punch out paper hearts and spread them around.  Needless to say, I will have to do something, otherwise my guests will be seeing this:
(See the evidence of my wire "helper" in the reflection?)

If you are considering this option, the hardware store also sold green, plastic-coated wire exactly like this.  It was going to be $4 dollars more, and I was being cheap, so I didn't buy it.  I think I would recommend it now, but it's too late for me!

Once I figured out the procedure, arranging the flowers went pretty smoothly.  I think I'll be able to do all 8-10 fairly quickly on the Friday before the wedding (like an hour...we'll time it!).  Adam did give me the official seal of approval on the centerpieces, so we are all set on that!  Hooray progress.

I did take pictures of the bowls as I was arranging them, if you want to see the step-by-step process, it is embedded below in a PowerPoint.

So that is the sum of my $25 floral investment.  I managed to get 3 things checked off my to-do list and there's now a little more room in this head of mine for more wedding stuff!

Did you practice with flowers before your wedding or did you just wing it?  Or...did you have a florist take care of everything like a normal person would?!?!

Monday, February 4, 2013

Something Borrowed: The Centerpieces

These are what I call the "H Bowls."  They have a full name, named after dear Bridesmaid H because they were originally purchased in 2008 for her wedding (really? almost 5 years ago? sheesh).  I could call them by their shape (short, giant martini glasses), but that's not nearly as fun as writing down "H Bowls" everywhere on my to-do and supply lists.


Needless to say, our friend circle has definitely gotten their money out of these babies.  These guys have been featured in H's wedding, the next year they were in L's wedding, the next year in L#2's wedding, before finally taking a year off.  This past summer, they were used at J's rehearsal dinner and will be making a fifth appearance at our wedding this June.  What is great about these bowls is not only that they are free glassware for the wedding, but they've become a tradition amongst our friends.  It's been neat to see how everyone has used them throughout the years and how we can tweak them to make them work for our own wedding.  

Here is a quick montage of how the wedding bowls have been used in the past:


Photos stolen from Facebook.  Thanks guys!
The first picture is from H's wedding, the second is from L's wedding and the third is from L#2's.  Sorry for the bad quality on the last one, I had to crop all most of our beer cups out of the picture!

So, as you can see, flowers and floating candles have been quite the theme with these bowls, and our wedding will really be no different.  The mirrors actually made their way home to Tennessee where H's in-laws live so I went ahead and bought some from Home Depot for $30 ($10 for 6 mirror tiles, in the bathroom section) and plan to use them like in the first two pictures.  

Here is my vision for the H Bowls:
They will be filled with our wedding flowers (white roses, carnations and hydrangeas) and have nice, new candles.  I have a heart shaped punch, so I am thinking of punching out hearts in paper that matches our colors and spread them out instead of flower petals (or dyeing the flower petals)...clearly I'm not quite sure yet!

We are actually going to have two types of centerpieces:  the H Bowls and then there will also be candle sets for the other half of the centerpieces...post coming soon (if I ever get the project completed)!  I will use the mirror tiles for those too and either flower petals or paper hearts around the main part.  

So, yes!  That is the great legend of the H Bowls.  So far, everyone is still married, so I'm going to say they are good luck charms too!  :)

Do you have any sorts of traditions among your friends that you will be including in your wedding?  

Wednesday, January 16, 2013

The Catch-up Post: Part 2

In continuance of yesterday's Catch-up Post: Part 1, I shall share more of my wedding-related endeavors:

4.  We booked the limo
I wanted to get the limo booked this past week because there is a bridal show coming up this Sunday.  I figured if I wanted to get it reserved, I better beat the crowd.  This limo service will be at the bridal show, so it will be nice for me to pick up my receipt and contract without having to make a separate trip or get it mailed to me.  We are using Top Hat Transportation Limousine Service here in Manhattan and we chose the Ford Excursion.  They also have a Hummer that seats 20 people, but 1). we really don't like hummers or the douche-bag reputation they have (in my own opinion, of course!), 2). we only need to have space for 13 people and the excursion seats 14, and finally 3). we don't need to pay an extra $100 for something we don't want or need.

Here is our ride from the church to the reception:

While this is something that wasn't a necessity AT ALL, Adam and I would both like to have a chance to hang out with the bridal party, get a bit tipsy, take some pictures with the photographer around town, and get transported to the reception without having to try to fit the dress into a car.  The minimum was 2 hours, and at $135/hour the total was just under $300 at $291.60.  I know that I've spent more money on crap at Wal-mart than that.  It also comes with a free bottle of champagne, soft drinks and glassware to use during our ride.  Check!


5.  We attempted bridesmaid dress shopping
I made an appointment with David's Bridal for the very end of December so that the bridesmaids could get together and we could go dress shopping.  Their Spring catalog had come out about a month earlier, so I was excited for the girls to be able to try on the new dresses and figure something out.  So we embarked on the trip to Topeka for dress shopping, only to find out that the majority of their Spring dresses had not been delivered to the store yet.  They had shipped the "board" and the catalogs of all their Spring dresses...but they hadn't shipped the dresses yet? Weird.  So the two bridesmaids that could make it tried on a few things, but we have to go back in February to (hopefully) finalize the deal.

I told the girls that I didn't care what dress they picked out as long as it was on the short board and was in the color peacock.  We'll see how my attempt at mismatched dresses goes.  The attendant was a little worried about exact length (above the knee, knee and mid-calf) and the fabric type, but I don't think it will be too big of an issue...we'll have to wait and see!


6.  We finalized plans for the rehearsal dinner
If you remember, Adam and I went to Hibachi Hut before our engagement pictures (and drank a little too much). Both of us are in love with the place and were hoping that we could use the restaurant for our rehearsal dinner.


I knew the Hibachi Hut did catering, but I didn't want to have to hassle with finding a place to rent out, hiring a caterer, dealing with linens and decorations twice.  So we called them up the other day to see if they were willing to let us use half of the restaurant for our rehearsal dinner and we sat down and talked with them a few days later and our answer was Yes!

The catering manager/owner suggested that we order several different dishes and let people choose from those options, but we particularly like the entire menu and the variety of dishes that it offers.  It's technically a cajun restaurant, but you can get anything from a hamburger to chicken fried steak (Gordon Ramsay would be so disappointed!).  We wanted to give our family/friends more options than four, so we asked if they would just let everyone order off the menu...and they said yes.  The only stipulation was that everyone probably won't get their food at the same time.  Adam and I discussed this and said we'd rather do that and just forewarn everyone about the timing.

Hibachi Hut was originally two different restaurants, that and Texas Star Cafe. You would walk in and say which restaurant you were going to.  In the last couple of years, they merged it into one restaurant and did some renovations, but it works quite well to reserve half of the restaurant to ourselves:
You can see the other side of the restaurant through the "windows" / Source


Pretty much they were flexible with anything we wanted.  We know the food's great and they're going to make our beloved long islands in a pint-sized glass (rather than the big ones) to serve as a signature drink!  We said yes, let's do it, and it's nice that we don't have to pay a penny besides the final bill at the end of the night.


Thanks for tuning in for another installment of The Catch-up Post!  Not a very comment worthy post, but share your wedding progress!

Thursday, September 20, 2012

DIY: Will You Be My Bridesmaid?

Here is the much awaited (since I announced it yesterday) tutorial for my Will You Be My Bridesmaid? Wine Bottle and Goblet Project

The "Will You Be My Bridesmaid?" Wine Bottle and Goblet Project:
Materials:
Wine glasses - I purchased 4 from Dollar Tree.  They are a bit on the large size!
Contact paper - I also purchased this at Dollar Tree.  You don't need that much so I would recommend purchasing the smallest amount necessary
Etching cream - Hobby Lobby
Foam Brush
Scissors
Cutting surface
Craft knife

Wine of your choice - something that has a removable label will make your life easier
Martha Stewart Labels - I purchased a pack of 6 removable labels that were 3.75 x 5.2
Computer and Printer

Steps:
1.  Find a font that you want to use and print off several different sizes to see what will cover up the wine glass the best.  I chose to use the font Fashion Victim that can be found at dafont.com.

2.  Trace the letters onto the contact paper.  Make sure that you trace on the plastic side rather than the paper side or else you will cut your letter out backwards.  True story.
  

3.  Cut the inside of the letters out with a craft knife and position on the wine glass.  Press down well and remove any bubbles around the edge of the letters.  It won't matter if there are bubbles on the outside edges of the contact paper, but it needs to be smooth where the letter is.
The top left corner looks like a bubble, but I actually just cut the contact paper and overlapped those edges because there previously was a bubble that I couldn't smooth out.

4.  Apply a layer of etching cream to the exposed areas of the glass where the letter has been cut out.
  

5.  After the etching cream has set for 5 min, rinse the wine glass completely.  There are warnings against getting the etching cream on your skin so be careful!  I removed the contact paper, did a little drying/polishing and then your glass is set!

Now onto Part 2!
1.  The Martha Stewart labels are made by Avery which means that in Microsoft Word there is already a template for the dimensions of the label. So it starts out looking like this...and then I worked on the design.

#1

#2

2.  I ultimately decided on Style #2, trying to match the color of the blue to the border on the labels (the borders on the labels came blue and green - three of each).  Since there were only three of each color and I have 4 girls, I used a green border for my MOH's label.

3.  I printed off the labels using a regular inkjet printer.  I did have some issues with printing!  I don't know if the labels were slippery, but my printer kept printing too high up on the labels and then they were off-center.  Since I didn't want to go out a buy more, I just ended up cutting the labels so that they were symmetrical. (No picture, so sorry!)

4.  Remove old wine label.  My new labels were smaller than the original labels on the wine bottle, so the old one had to go.  Thankfully, Relax Riesling uses a clear plastic label, so it came off really easily.  I did wipe the bottle down to get rid of any remaining residue with a warm, damp cloth. 

5.  Add the new labels on and smooth!  I worked in an X shape to smooth down the labels so that there weren't any bubbles.  These labels are actually removable, so if you mess up, you can peel it up and start over.

6. Combine with the personalized wine glass and you have yourself one classy set!

7.  To finish if off, I wrapped the wine glasses in tissue paper and then put both items into paper gift bags that I bought at Dollar Tree.  I also wrote each girl a letter, printed off an envelope with their name on it and added it to the bag.

I wrote each girl's name on the front of the bags with a silver sharpie.   I kind of wish that I would have put more effort into decorating the bags, but I didn't!  In hindsight, I would probably stencil their initial onto the front and maybe throw some glitter in there!

8. Now they're all ready to be sent out into the world!

Price Breakdown:
Wine glasses - $4
Contact Paper $1
Etching cream - on hand (but it had a $7.99 sticker - take a 40% off coupon with you!)
Gift bags $2
Wine $40
Labels $3                 
Total = $50 ($12.50 per bridesmaid!)

So what do you think?  Is there anything that you would have done differently?  How would you have decorated the gift bags?  Have you done any similar projects?