Showing posts with label decorations. Show all posts

Friday, June 27, 2014

Wedding Recap #1 - The Flowers

Hey guys, remember me?  I have a feeling that the majority of those 19 followers have long since gotten married and abandoned the wedding blog scene, but I finally have the motivation to do some recaps while off work for the summer, so let's roll with it. 

If you remember, and if you don't, I decided to have the florist put together the corsages and boutonnieres and left the remaining burden on myself.  I ordered 200 white roses, 150 white carnations and 150 white pompons/cushion/mums from Sam's Club and needed to make 5 bouquets and 8 centerpieces.  I had previously tried the whole shipping-flowers-thing with my high school students for prom earlier that year with great success and the savings was pretty big ($300 total for all those flowers)!

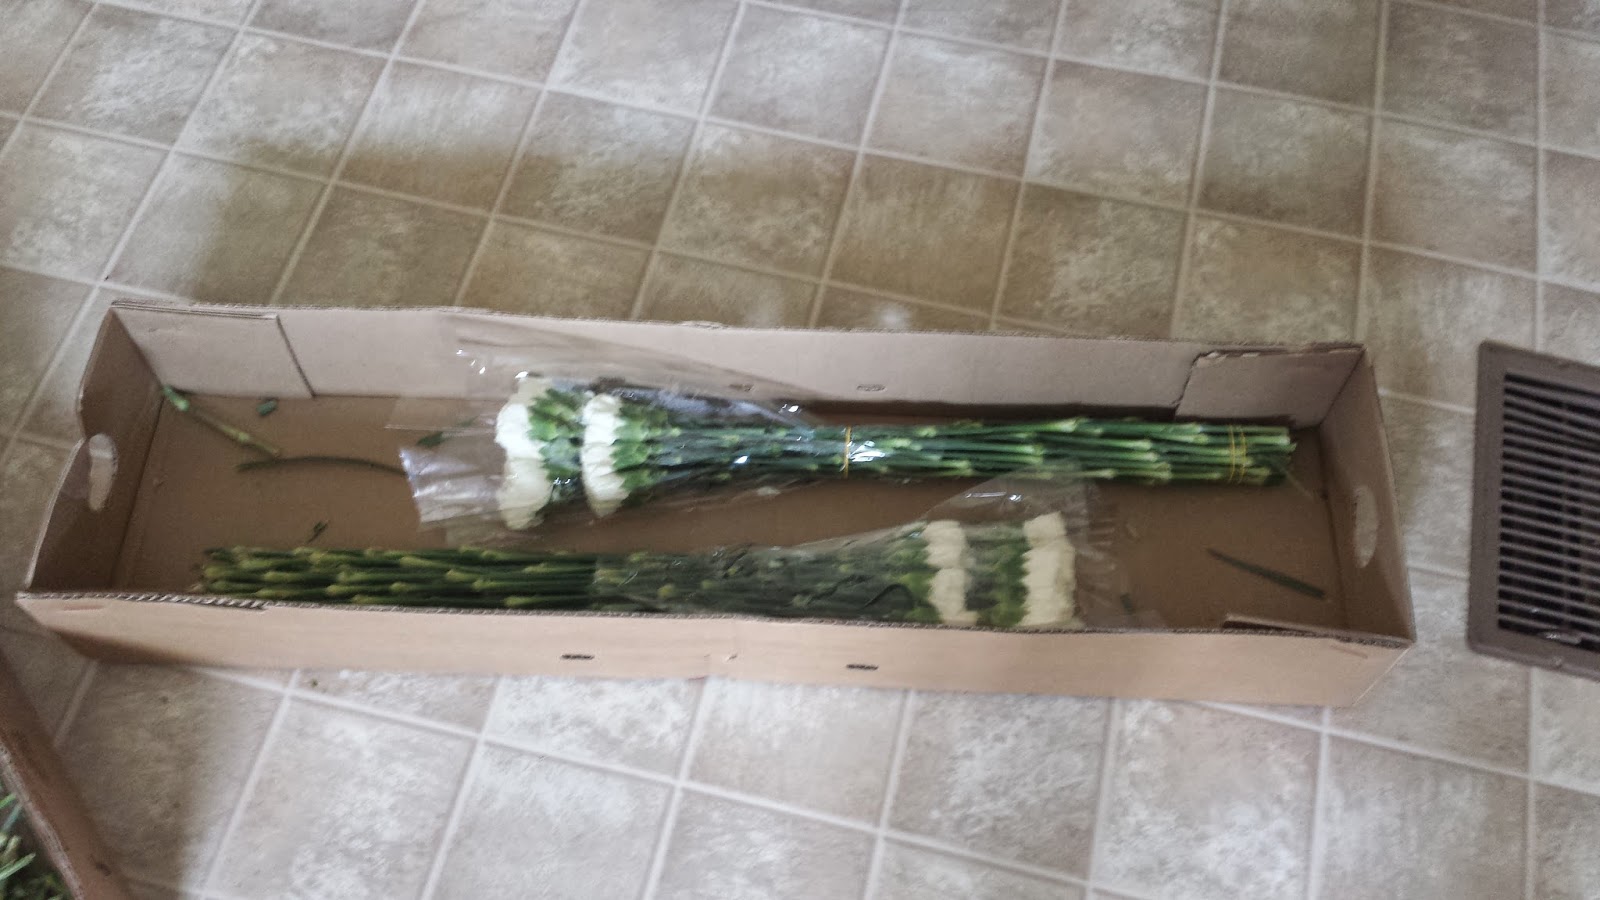
Once the flowers arrive at your door, they need to hydrate for at least a day before you want to start working with them so I had them set for delivery on Thursday and they appeared on my doorstep, perfectly on time, like this:
 
 
Once inside, they come packaged together in clumps, usually in two layers to help protect the buds:
 Carnations
 
 Mums
 
Roses
 
 
They have you cut the stems at the bottom and then hydrate/feed them in buckets of water.  I had previously gone to Wal-Mart and bought a few buckets, but the bakery also gave me some for free, you just have to ask!
And there you have 500 flowers in my bathroom!
 
I let them hydrate over night and then come Friday morning we started assembling everything.  My mom was there to help me and she started working on the centerpieces.
Photo Credit:  Grant Watkins Photography
 
I started with my bouquet and then worked my way through the bridesmaids'.  The hardest part was definitely putting the ribbon on there, but Adam surprisingly ended up being very talented at this and became head ribbon-on-bouquet man:
Photo Credit:  Grant Watkins Photography
And the bridesmaids' slightly smaller versions, with peacock blue ribbon instead.
Photo Credit:  Grant Watkins Photography
 
All in all I definitely over-ordered, but I was more afraid of not having enough flowers and having to scramble at the last minute and that just wasn't worth it! We ended up having over a bucket of mums left and then I put the extra roses in a large vase on the cake table (which the bridesmaids ended up stealing some to make me a bouquet to use in the toss (sealed with electrical tape instead of ribbon though). 
Photo Credit:  Grant Watkins Photography
 We'll talk about cake and the bouquet toss later...
Photo Credit:  Grant Watkins Photography
 
After the wedding, Adam's mom ended up taking the leftover flowers since we couldn't really enjoy them on the honeymoon and all worked out splendidly. Considering that the florist quoted me $300 on just the centerpieces alone, I was very proud that I was able to squeeze the bouquets in that price and also have the stamp of my handiwork on one more element. 
 
Anyone else attempt/are thinking about the DIY flower route, do share!  Any readers still out there...? Stop by and say hi!


Saturday, July 6, 2013

Basking...in the Bathroom?

I'm back...
...and feeling a little more married! 

Since the final days before the wedding were a little crazy, I have a few tiny projects that I was waiting to share (or didn't have time to share).  Once we get the official wedding pictures back, we'll start doing some recaps!

Bathroom Baskets:
Since I've come across them, I've always thought bathroom baskets were a cool idea.  It's nice to have an extra hair tie lying around or some gum just to freshen up.  I went to Dollar Tree and bought three wicker baskets, two 3.5x5 picture frames and all the contents from there and also Wal-mart. 

Between the frames, baskets and contents, the total came to about $50.  A little expensive in my mind, but I have all the leftovers to use myself.  The girls and I all got ready at the reception hall (since there wasn't anywhere to do so at the church), so it came in handy when we were getting ready to have an extra bobby pin or make-up remover, or safety pins in Bridesmaid H's case!
The men's basket
 

...and the women's

Each basket had a sign beside it in a small 3.5x5 frame like you see below (except without that pink heart!).

Here are the contents for each basket in case you are wondering:
Men's:
Spray deodorant, bandaids, tide to go pen, day quil, ibuprofin, tylenol, antacid, disinfecting wipes, antibacterial soap, kleenex, lint roller, scissors, pen, q-tips, nail clippers, hand lotion, eye drops, contact solution, mini-toothbrushes, flossers, chewing gum, breath strips

Women's (in addition to the men's basket):
Bobby pins, hair ties, hair spray, static guard, wrinkle releaser, nail kit, pads, tampons, safety pins and a sewing kit

So there's my very common, very stolen idea for the bathroom baskets. Very few items were actually opened or used, but I feel like it was a nice and fun touch to add for our guests.

Thursday, June 20, 2013

Wedding Week #2

If you missed Wedding Week Post 1, we are saving my sanity by creating Twitter-quality updates about the upcoming wedding and my recent projects so that I don't feel like a bad blogger. Please do comment if you would like a tutorial for something, just keep in mind that it will be July before you see it!

1. Got my hair did
I went in last week with mom to get a trial-run done with the hairstylist for my wedding-day hair. Mom wasn't sure if she wanted to get her hair done, so she tagged along with me and we got dolled up together (and went to Applebee's afterwards looking incredibly over-dressed...or over-haired...or something). I'm keeping the back as a secret now, but just imagine a pretty white flower and bobby pins with pearls on the end and we'll see how close you get to the final product later!
2. Bought some wine
Not much to say here. We're having Yellow Tail (Moscato, Pinot Grigio and Pinot Noir), Franzia Chillable Red (Adam's Mom's fave :D), and SutterHome White Zinfandel (my mom's favorite). We're giving each table a bottle of Andre champagne for the wedding toasts. It's the kind that I always drink at New Years, so if it's good enough for me, it's good enough for my guests to get for free! Maid of Honor N requested her own special bottle, which I agreed to. She's been known to steal champagne bottles off of guests' tables, so we're going to try to avoid that!
Thankfully we have a good booze security system
 
3.  Wedding Favors
I made our favors using Hershey's kisses and cellophane candy bags.  It was a pretty inexpensive way to combine the candy rather than the mini-boxes or jars.  I bought some Washi Tape with hearts on it and used it to seal the bag shut on the back side and then put a sticker with our names on it (from the VistaPrint order) on the front.  If you're looking to do candy, the cheapest I found was at Walmart.  I looked online at some places, but Wal-mart matched or beat those prices.  I bought plain, caramel, and almond kisses and hugs to give the favors a little variety.  I really wanted to put little stickers on the bottom of the kisses, but the night that I wanted to bag them I didn't have the patience to go out and buy little stickers and delay the process any more.
 
 
4.  Grandma's Charm
I mentioned about a month ago that I wanted to get a charm of my Grandma's to put on my bouquet to carry with me at the wedding.  My mom and I went out to my Grandpa's house last week to look through some of her stuff.  She and my grandpa used to own a thrift store and so they have a ton of things in her house and jewelry was no exception.  Grandpa showed me to her costume jewelry first, but nothing really spoke to me and I wanted something that was a little more personal.  Grandma had some really old jewelry that was passed down to her from when she lived in Germany, but it made me deathly afraid that something might happen to it.  Then I found the perfect thing, a guardian angel on a bracelet chain.
It really has no value (monetarily), but my Grandma used to wear a pin each day on her shirt with this exact same guardian angel (or an American Flag).  She had a couple of extras, so my mom is going to wear one at the wedding and then we are going to give one to my mom's best friend who is also our coordinator for the day.
 
5. Copycat Success
A long time ago, I stumbled upon this image that showed up on Pinterest.  It links back to WeddingBee, and the image is from The Knot, but I can't seem to find the original source.
I knew I wanted to do these for the wedding, so I bought 2 vases at Hobby Lobby for 50% off, submersible LED lights, fishing line and weights and baby's breath and set to work.  I had some floating candles that I had inherited from another wedding, so I was set.  And we succeeded!  Check out what will be hanging out on each side of the bar:
The light at the bottom will need to be repositioned better for the real thing, but it's kinda hard to make these ahead of time and just drop the light in there and hope it works.  The batteries are supposed to last 12+ hours, so maybe I'll just cross my fingers on the wedding day and turn them on in the afternoon.  Well see!
 
And that's it for Wedding Week #2.  Next time you'll hear from me, I'll probably be a Mrs!


Tuesday, June 18, 2013

Wedding Week!

In honor of this being the official Wedding Week, my posts are going to be a series of pictures with tiny descriptions.  If there's something that completely blows your mind, leave a comment so I can do a tutorial...in July!

1.  Dinner Menus - a rather unnecessary element to the wedding, but we're getting navy linen napkins and I want to fold them and tuck the menus in the pockets for each place setting.  I made them 3-per-page (landscape layout) on Microsoft Publisher so the dimensions are 3.5 x 8.  I wanted there to be some element of entertainment for people while they are waiting, so I added a Sudoku puzzle and crossword to the back.  There are easy-to-find generators on the interwebs, so that's what I used.

2.  Seating Chart - I went back and forth about doing this.  Ultimately Adam and I decided that there are too many groups of people that will be attending this wedding that don't fit together.  When we tell people that there is a seating chart, they groan, but in reality we are trying to do them a favor by seating them with people they are comfortable with and not forcing them to "reserve" seats for the rest of their group that hasn't shown up yet.  (I think we have some family members that are scarred from school seating charts). The biggest pain was knowing exactly who was coming to the wedding - kids names, correct spellings, undecided people, etc.  It made for a lot more phone calls than I would have done otherwise. 
 

3.  Table Numbers - since we assigned tables to our guests, each table needed a number.  We originally were going to have each table named after a Game of Thrones family.  We don't have anything nerdy in the wedding yet and thought that would be fun.  I also wanted to put a number on them (underneathe the family name) so that there was some sort of logical order that could help our guests find their tables easier without having to wander around the whole room. I ordered some frames from Oriental Trading, but they were really too small to put a name and a table number.  Thus, we have boring table numbers, but they will do!
 
4.  And finally, to conclude this Wedding Week post, I got a new job! I will be teaching at Manhattan High School next year and am extremely excited to not have to commute to work anymore.  MHS is my alma mater and I am looking forward to working with my former teachers.  It is really sad to be leaving my Wakefield family, and I didn't find out until the last day of school, so I never got a chance to say goodbye to the kids. But all things aside, I am looking forward to the change and think it will make me a better teacher in the long run.
 
Lindsy, you say, this isn't wedding related.
 
I know, but it took me a ton of time to move out of a classroom that I have steadily filled for the past five years and it took away from some of my wedding planning.  And I share a ton about my life here so why not throw in some other content.
My empty classroom and a full storage unit.
 
Stay tuned for another helping of Wedding Week posts.  And then recaps.  And tutorials.  Hooray!

Wednesday, June 5, 2013

The Bar Menu

We're under the 3-week mark until the wedding!

To celebrate, Adam and I did some wine tasting last night...


...in order to complete our bar menu:

We purchased the liquor awhile back at Sam's Club, ordered the kegs this past weekend, talked with the reception hall about what types of soda were available in the CO2 guns, added a few more to the list (Adam loves cream soda) and finally got our wines figured out to make a final draft of the bar menu you see here.

I downloaded the chalkboard background off of a WeddingBee post and then did all my editing in PowerPoint. Probably not the ideal photo-editing/production program, but it was the best that I had.  I downloaded a few fonts off www.dafont.com including Mutlu ("Bar Menu"); Sverge Script Demo (headings) and Trajan Pro (Pepsi, Bud Light, etc) to create the design.

Walgreen's was having a 40% off photo sale, so I saved the PowerPoint slide as a high-quality image file and then sent it off to get printed as a 20x30 poster.  I picked it up this morning, costing me $15 and bought a 20x30 piece of foam board that I glued to it to make it a little more sturdy. I borrowed an easel from school to post it at the reception, but the easel kind of swallows the poster since it's so much bigger than I realized, so I'll probably just prop it against the bar or get an easel that I can stand up on the bar to display it.

So there's one of many projects I have yet to post as we approach the big day.  Aaah!

Thursday, April 18, 2013

The Post about Wedding Napkins

Originally, I was going to make personalized napkins:  

I felt that $30 for 100 napkins was just plain silly.  I can buy the napkins for $5 and do it myself for half the cost.  I already had the heat gun, I just needed to find the right stamp, ink and embossing powder.   

Well, change of plans!  Theknot.com was having a sale, $10 for 100 personalized napkins.  So I got 3 sets.  And yes, I spent $30 on napkins (which was what I originally was trying to avoid in the first place), but lemme explain:  
I was only going to get 2 sets of 100.  Okay, $20.  Well, shipping ended up being about $8, so $28.  But The Knot was offering Free Shipping on orders of $25+.  So instead of spending $28 on 200 napkins, I spent $30 on 300 napkins and slept just fine that night.

Could I have done it for less?  Yes.
Did I feel like saving a little money was worth the time it would take to make them myself (plus the cost of the extra supplies)?  Not so much. 
Do I regret having to cross something off my DIY list that I did not DIY? Nope.

So thus we have our napkins in 3 different colors and designs:

Overall, I was really happy with my purchase.  The quality was great, the price was unbeatable and the amount of work involved was minimal.  I had read some reviews saying that some of the napkins had stuck together and didn't get printed on, but they actually sent around 110 napkins in each box and I only had 5 napkins that I won't be using:

My only complaint:  it took over a month from the time I purchased them to the time that they shipped.  Wowsers.  Don't wait until the last minute for these guys!  And don't forget to sign up for their emails so that you can get in on these deals!

Saturday, March 23, 2013

Good News, Everyone!

Today, on the blogging menu, we have lots of random tidbits. Each one is followed with an exclamation point as there is definitely some exciting-ness going on.

1.  On Tuesday, we hit 10,000 page views!
When I first started this blog, I wondered if I would even hit 100.  There was no particular number goal, as this blog just serves as an outlet for me to talk solely about wedding-related things, but it's cool to see that my posts are being read and hopefully helping someone out in Webland.


2.  Yesterday was the 3-month mark until the wedding!  It's crazy to think that June is only 3 months away, but I better get used to it!

Since this week is Spring Break for me, I went to the District Court's office on Monday and applied for our wedding license.   I don't know if it's the same in other states, but I went back on Friday to pick it up after our 3-day waiting period.
This was something that really let sink in the fact that the wedding is only getting closer and closer.  The clerk in the office started telling me what to do in regards to name-changing, which I AM doing, and I started to understand how big of a task that is going to be post-wedding.  I googled it when I got home, and holy cow, my name is on a lot of stuff.  That should be a no-brainer, but it starts to add up:  social security, work, insurance, driver's license, utility bills, bank accounts and credit cards, email, passport, voter registration, doctors, my teaching license, car/home registration, etc.  Thank goodness I have the summer off!  I'll also be curious to see how my students deal with it when we get back to school.  I mean, I do teach high schoolers so they are perfectly capable of calling me something new, but some of these kids I've taught for 1-3 years so it might be an interesting adjustment for them.


3.  I managed to complete our aisle runner!
(The C is blue, but the picture makes in kind of hard to tell)

I started this project last summer, but my cat decided to cuddle with it and subsequently tore it all up.  I managed to salvage the part that I painted and decided that we would use it on the cake table: 

At that point, I was sick of painting and put all my supplies away (and the remainder of the aisle runner up high and out of kitty reach).  I decided to tackle the project again about a month ago when we had a slew of snow days.  Adam and I went over to the church and measured the length of the aisle to make sure that we had enough fabric left, decided where we wanted the logo to be positioned (it's going to be up by where we stand), and then cut it to size.  This time I was extra careful:  locking the cat away in the other room if I was going to leave the house for a little, making sure it had enough time to dry so that I could put it in the spare room overnight, and keeping a keen eye on the cat anytime he was wandering around.

My efforts turned out to be well-founded and we now have another item checked off this to-do list. To store it, I covered the painted area with wax paper and rolled it back up together where it will safely wait for its debut high up in the closet.

I'm not going to make a tutorial for this one since I basically did on the first post, but check there if you're wondering how it all went down (or at this blog which is where I originally got the idea and has a great tutorial).  Basically, print a template, trace it in pencil on the aisle runner, put down wax paper on your work area and paint using acrylic paint (and have a variety of paintbrushes).  And have patience.  I would work in one direction, let it dry and then come back and work on the other side of the outline of letter.

4.  I found this Pinterest user:  Labels @worldlabel.com!  I actually ran across their blog and they share tons of free label templates.  I have had the hardest time finding free vector images and templates like this so it will be a great asset.  They are basically a company that sells printable labels, but they share so much free stuff, it is awesome!

And I guess we'll call it a wrap for this blog post.  If I ever get these wedding invitations finalized then I  can share them!

Do you have any exclamation point-worthy tidbits to share?  Do it!

Monday, March 18, 2013

Playing Games

I was really planning on a 100-Day Post, but as you can see, I failed.

Whoops.

With that being said, the 96-Day Post is about...playing cards!

I have always loved the concept of games at the wedding reception.  I believe that it really portrays how the couple wants their guests to be entertained, whether they are waiting for the bridal party to arrive, or just enjoying the lull between main events. I think it demonstrates a little bit of extra thought, and hopefully, keeps guests entertained for a few more minutes.

While I really didn't want to take up the space to create a board games table, I thought it would be neat to incorporate the idea throughout the wedding.  On our programs, I plan on having some sort of game - a crossword or song guessing game (based on the string versions of some of our favorite songs).  For our dinner menus, I have designed a Sudoku puzzle and a word search on the backside. With those two elements, I thought playing cards would be another great addition.  Rather than create a set for each table, I decided that I would keep them stored at the bar so people could grab them if they come up for a drink and need something to do.  

While I could have just grabbed some decks of cards and threw them up on the bar, I decided that we really needed cute boxes with our names on them. Hence...


All in all, it was quite an easy project.  You just need some thick paper, scissors, sticky tape, a scoring board and some playing cards.


1.  Take an existing deck of cards, unfold it, and trace the deck as a template on the paper.

2.  Cut out the deck on the lines you drew

3. Score the lines based on where the folds of the deck box are.

4. Tape the main edges together and fold in the flaps

5. Insert cards and add any decorative elements

 I only made 10 sets, so hopefully that is enough! It was a little time-consuming, but I think they turned out acceptable enough to consider using my spare time to complete them.  I used extra paper left over from my invitations (post coming soon...really!) and then used the free seals that I bought from Vistaprint when we ordered our Save-the-Dates. I bought the cards at Dollar Tree and they came in packs of 2 for $1.  Needless to say, I spent about $5 on 10 decks of cards and potential entertainment for 10 groups of people. Hooray!

Sunday, March 10, 2013

I'd Dye For You

A little shout out to the great Bryan Adams.

I think we've found my first project that I'm actually giving up on.  We've had some bumps in the road thus far, but dyeing flower petals is the first official Failure with a capital F.

I found this tutorial from the Dollar Tree website awhile back.  I knew that I was going to want to dye them a dark color, so I was a little skeptical of how well it would work.  But after looking at the picture below (from their website), I figured that since the purple was pretty dark, I surely could do dark blue too.

The Process
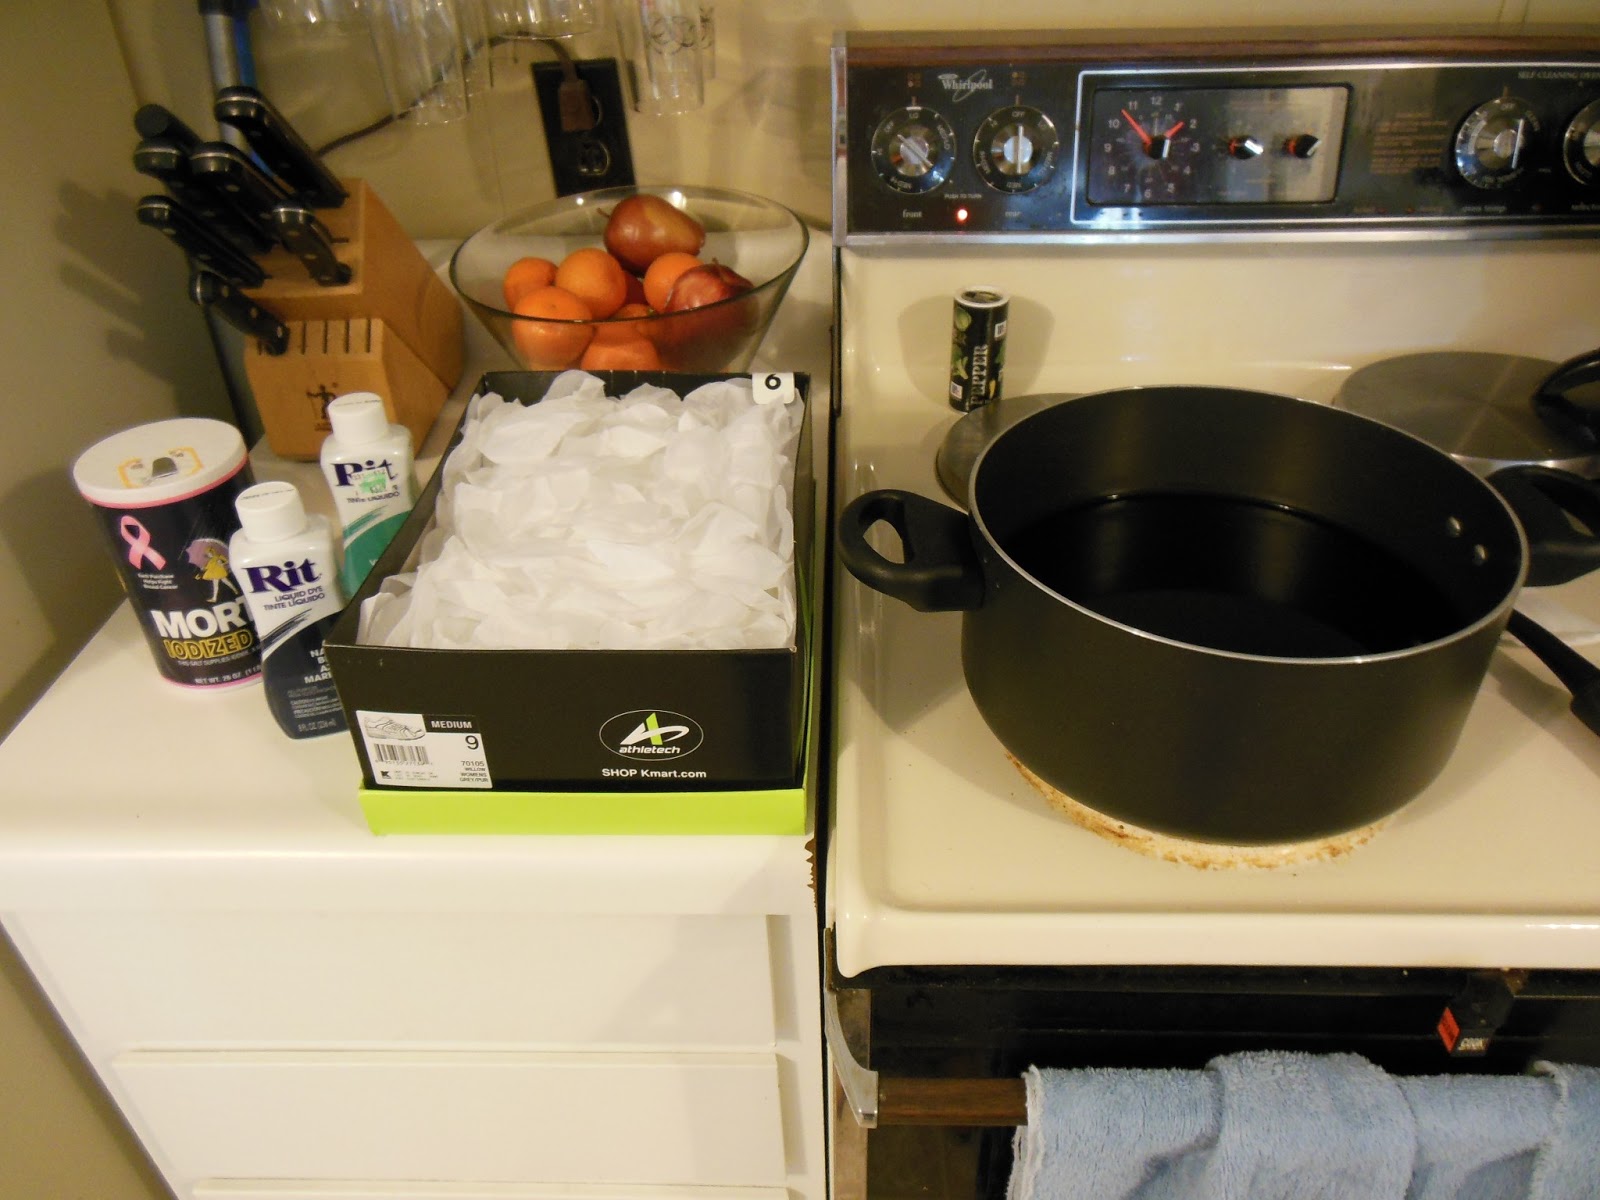
1.  I bought 5 packs of flower petals from Dollar Tree ($5) and Rit Liquid Dye in both Navy Blue and Teal ($6ish).  Since our color isn't exactly Navy, I thought the teal might provide a little bit of green into the mix.  I thought about dyeing the petals teal first, letting them dry and then re-dyeing them navy, but I scratched that idea and just mixed the two colors together.  That could be the reason that this process failed, but in all honesty, I really think it is the type of fabric of the petals that inhibited the whole process. 

2.  I put 2 quarts of water in a pot, added 4oz of each color of dye and 1/4 cup of salt.  I heated the mixture on Low for 5 minutes before adding in the flower petals.  I bought WAY more flower petals than I could fit in the pot, so I just added enough that they were still fully immersed in the dye.

3.  And let simmer covered on low for 3-6 hours.  I stirred the petals about once per hour.  After 6 hours, the flower petals still weren't the right color, so I kept them on even longer.  I actually took some of the petals out, rinsed them and let them dry.  Hoping that they needed a second round of dye, I put them back in the dye (but it didn't make a difference).

4.  At bedtime, after the petals had been simmering about 9-10 hours, I decided to to call it quits.  I rinsed the petals and set them out on an old towel to dry.  I wasn't very happy with the color, but thought I'd sleep on it (and that they might magically change color overnight).  

5.  By morning, I had the same lavender-blue flower petals that resembled neither the navy blue or the teal dye that I had used.  I got out my peacock color swatch to compare the differences between our actual color and promptly decided that it was "unacceptable" (with a snobby British accent).  I didn't have much hope for trying to dye the petals a second time, so the project was officially crossed off the to-do list.

If you recall, I was going to use the flower petals to decorate around our centerpieces.  I had been playing around with either using the flower petals or paper punched hearts.  

So I guess we'll be using the hearts instead!  I'm actually okay with this because it means I get to pick out fun paper that matches our color scheme!  Here's a quick example using some of the paper samples I ordered in search for our invitation paper (post coming soon on that!)

So there it is.  My big Failure.  If anyone would like my lavender-blue flower petals, feel free to message me and I'll send them to you!  

Thankfully, I only wasted about $10.  What were your crafting/wedding failures?

Tuesday, February 26, 2013

The Candle-Making

I'd like to think that wedding planning had made me smarter and more knowledgable. I used science(!) to cut the glass bottles and then we were off to explore candle-making territory.  

I did some reading online and decided that I wanted to use soy wax.  They say it burns cleaner and is a slower burning wax than other types.  Ok.

Then I read about candle wicks.  I had no idea that there were different types of wick sizes and materials. I found the website, CandleScience, that had a Wick Guide.  It asked for the diameter of my glass and then it suggested what wicks to use.  I chose ECO-6 6" Pretabbed Wicks.  

The first thing that I needed to do upon commencing the candle-making, was to do a burn test.  Since these are going to be used for our reception, I wanted to make sure that it would stay lit for the entire 6ish hours.  You also want the wax to melt all the way to the edges after about two hours.  If it doesn't do that, then basically you need a different wick size.

The shortest glass size was the one that concerned me the most. I made two of those, lit them and took notes for the next six hours.  Thankfully, the candle burned well and was still lit 6 hours later.  I deemed the test run successful and set off to mass produce candles.


1.  I started off with my 56 pre-cut glasses:

2.  I took each wick tab and placed a glue dot on the bottom of it.  I then centered the wick tab in each of the glasses and pressed down hard.

3.  Now, you'll need something to steady the wick once you pour the wax in it.  You can buy wick holders, but I was too cheap for that.  I rubber banded markers together and sandwiched the wick in between them.  It wasn't perfect, but it did the job fairly well.

4.  Now it's time to heat the wax.  I used a Presto Electric Fryer and turned the temperature to 200 degrees (which is the lowest besides "warm").  I heated it just long enough for all of the wax chips to melt (about 175 degrees). 


5.  Once it was all melted, I poured the wax into a metal pitcher and kept my thermometer in the pitcher.  You want the wax to cool to 135-145 degrees before you pour it into the glasses.  It has something to do with the cooling/setting of the candles...sure.

6.  Once it's cool enough, pour!  I highly suggest laying down newspaper wherever you're working.  Soy wax cleans up super easy if it's wet, but it only gets more difficult the cooler it becomes.  It took about an hour for the wax to harden all the way to the top.  The glasses were still warm, so I let them cooler for several more hours before moving them around.

7.  And after you've poured 40 of these, ran out of wax and had to wait for 10 pounds more to be shipped, and made the last 16, you have centerpieces that look something like this:
I haven't quite decided on the arrangement here yet.  They're both clearly very similar and this is quite a trivial thing to spend brain cells on, but these are my two winning options.


And now we're officially done with centerpieces!  Hooray!


Overall, this was a seemingly a never-ending task that took the span of several weeks. I would heat eight cups of wax up at a time which would make about one complete centerpiece with seven candles.  Waiting on the wax to be cool enough was the big time consumer.  Also, some of my candles turned out with some problems which meant that I had to get the heat gun out and melt the entire top of the candle so that it could re-set smooth. 

I'm glad that I embarked on this candle-making, glass-cutting journey, but I must say that I'm even happier to be done with it.  Now I can focus on getting those durn invitations started on!