Showing posts with label ceremony. Show all posts

Saturday, May 4, 2013

Don't Tie Me Down...or Do.

We have ties for the groomsmen!
Normally, I would think that this isn't worthy of an entire post, but like everything related to the color Peacock in this wedding, it has proven to be a bit of a challenge.

I went to three different places looking for ties that would match my bridesmaids' dresses.  The two places in town either had turquoise or navy blue, but no peacock.  Durn.  So then I figured, since David's Bridal is affiliated with Men's Wearhouse, surely they would have ties that match that we could purchase for our groomsmen to wear.  Also wrong. 

Then the power of Google revealed itself to me.  I searched for "ties that match David's Bridal peacock" and found this gem of a website:  bows-n-ties.com. They don't blatantly advertise that they are trying to match David's Bridal colors, but after looking at the color names, it was pretty clear.

So, upon selecting the peacock swatch, these were some of the options that I was given.
I didn't really want a patterned tie.  Since the girls are already wearing different dresses, I thought it would be nice to have some cohesion amongst the groomsmen.  I let Adam pick between the first two and he chose the Elegant Teal Blue Mens Tie.  I wasn't particularly sure that it would match, but they don't charge a restocking fee, so I figured I would just return them if they didn't match well enough and suck up the cost of shipping.

After just a few days, they arrived and we put them to the test.  Luckily, I had picked up MOH and Bridesmaid H's dresses the week earlier when I was in Topeka so I was able to compare the ties against the dresses instead of the tiny fabric swatch.
Not too shabby!  They don't match perfectly, but they match better than anything I had previously found so I considered that a WIN. 

With this obstacle being conquered, Adam and I made a trip with his mom to the tuxedo rental store.  I think Adam was expecting me to pick everything out (since that's pretty much been the status quo thus far), but he forced to start caring when I told him, "this is your deal."  He picked out the Perry Ellis 213 style tux in which I did grant Lindsy-Approval:

Since we had ties for the groomsmen, we just had to pick out ties for the ushers and Adam and then vests and shoes for everyone.  We decided to go with just a standard black vest.  For ties, the ushers are wearing just a standard black tie and I persuaded Adam enough to get a white-ish tie (so that he could match MEEEE!). 
Sources:  Black / White / Teal


And shoes:


So we're all set for the guys!  We sent them to get fitted this past week and we'll pick them up on the Thursday before the wedding!  Adam's mom is paying for the groomsman's tuxes but unfortunately the ushers are on their own with a $120 bill.  :(

Tuesday, April 23, 2013

Special Delivery!

The invitations embarked on their journey into the world last week.  I had been steadily working on them since before Spring Break and had started ordering paper samples even earlier than that in February:

Turns out that the color peacock, while difficult to match in all other aspects, is also difficult to match to paper.  We ended up settling on just a navy blue linen cardstock for the pocketfolds, white linen cardstock and text weight paper for the announcement and pocket inserts, and shimmery onyx (basically shimmery black) envelopes.

I ordered my paper through several sources:
Recycled White Linen Cardstock/Text Weight Paper - Anchorpaper.com
Patriot Blue Linen Cardstock - thePapermillstore.com
Stardream Metallic Onyx Envelopes - Envelopemall.com

And what resulted what this:


I figured that if I wanted to do a darker envelope, I needed to find a way to print on them because there's no way in hell I was going to be practicing my calligraphy in the next few weeks. I also refuse to pay someone to do it.  I chose to make wrap-around address labels because I think they are fun (and what I think really is most important!).  Adam helped pick out the style and fonts and after that it was time to get a-typin'.

Let's step indoors, shall we?
Looks quite a bit different than that top one I started almost a year ago, huh? 

I made about 10 different templates and had Adam pick the style and fonts he liked best.  Since both of my sets of parents are paying for their respective halves of the wedding, we included both of their names.  According to my lady Martha (Stewart, of course), we were supposed to put "at the marriage of their daughter Lindsy Nicole TO Adam Shaun, but we liked the ampersand better.  If you read it through, it kinda sounds weird, but it made it to the final printing stage so it stays.

As for the inserts, I had originally designed them to be the different staggered sizes, but when I took the paper in to get cut at Staples, they kind of butchered my paper (for lack of a better term) with their cutter.  Since they fit so snugly in their pocket width-wise, I just arranged them how they were supposed to actually look height-wise even though they weren't cut that way.

For the Obamas and our non-technology-friendly family members, we sent postcard RSVPs as seen above.  I made sure that the card was 3.5x5 (the minimum), bought postcard stamps which are only 33 cents and slapped a return label on them.

However, most of the RSVPs look like this.  
It tells them to go to our wedding website and RSVP from there.  I am actually using Google Docs to compile all the RSVP information so anytime someone responds, it puts int in a nice spreadsheet for me.  I debated doing this, but I think eRSVPing is becoming more popular and more acceptable because it provides automatic feedback and saves the cost of postage.

Another thing we had to accomodate for was the fact that the pocketfold was technically our inner envelope.  With typical invitation etiquette, you write the official titles on the outer envelope and then include everyone's first names on the inner envelope.  Since we weren't going to write their names on the pocketfolds, we needed another way to make clear exactly who was invited to the wedding.  We decided to do this via the RSVP form by indicating how many seats we are reserving for them.  I imagine that everyone can figure out who is included in their particular number, but if we end up with some randoms in exchange for actual family members, then I suppose it's our own fault.

I made the belly band with left over scraps and printed our logos off onto linen text paper.  I backed the logo with the same shimmery onyx paper as the envelope to give it a little cohesion.

And here are all my babies in their bassinet.

I will say that it took quite a long time to put everything together.  The pocketfolds were hand-cut/folded/glued, everything was personally designed in Microsoft Publisher and printed at home, the paper was massacred at Staples (I'm not ready to talk about this yet), reprinted at home and then hand-cut, and finally stuffed, weighed, licked and stamped.  

However, I am so happy to have these finished and to have been able to make these myself. 
Are they perfect? NO  
Would I do it all over again?  YES (except the Staples part, definitely a NO there).

I will try to get a tutorial going for these sometime in the near future.  I didn't take pictures when I initially made them, but I'm sure I am going to need a few more (and I didn't accommodate for any extras at the time).  Stay tuned!  I will also share my sad Staples story (say that 5 times fast!) and perhaps a price breakdown in the upcoming days.  

Hope you like my blood, sweat and (literally) tears! Did you attempt to make your own invitations or think that is a path you are willing to go down?

Saturday, March 23, 2013

Good News, Everyone!

Today, on the blogging menu, we have lots of random tidbits. Each one is followed with an exclamation point as there is definitely some exciting-ness going on.

1.  On Tuesday, we hit 10,000 page views!
When I first started this blog, I wondered if I would even hit 100.  There was no particular number goal, as this blog just serves as an outlet for me to talk solely about wedding-related things, but it's cool to see that my posts are being read and hopefully helping someone out in Webland.


2.  Yesterday was the 3-month mark until the wedding!  It's crazy to think that June is only 3 months away, but I better get used to it!

Since this week is Spring Break for me, I went to the District Court's office on Monday and applied for our wedding license.   I don't know if it's the same in other states, but I went back on Friday to pick it up after our 3-day waiting period.
This was something that really let sink in the fact that the wedding is only getting closer and closer.  The clerk in the office started telling me what to do in regards to name-changing, which I AM doing, and I started to understand how big of a task that is going to be post-wedding.  I googled it when I got home, and holy cow, my name is on a lot of stuff.  That should be a no-brainer, but it starts to add up:  social security, work, insurance, driver's license, utility bills, bank accounts and credit cards, email, passport, voter registration, doctors, my teaching license, car/home registration, etc.  Thank goodness I have the summer off!  I'll also be curious to see how my students deal with it when we get back to school.  I mean, I do teach high schoolers so they are perfectly capable of calling me something new, but some of these kids I've taught for 1-3 years so it might be an interesting adjustment for them.


3.  I managed to complete our aisle runner!
(The C is blue, but the picture makes in kind of hard to tell)

I started this project last summer, but my cat decided to cuddle with it and subsequently tore it all up.  I managed to salvage the part that I painted and decided that we would use it on the cake table: 

At that point, I was sick of painting and put all my supplies away (and the remainder of the aisle runner up high and out of kitty reach).  I decided to tackle the project again about a month ago when we had a slew of snow days.  Adam and I went over to the church and measured the length of the aisle to make sure that we had enough fabric left, decided where we wanted the logo to be positioned (it's going to be up by where we stand), and then cut it to size.  This time I was extra careful:  locking the cat away in the other room if I was going to leave the house for a little, making sure it had enough time to dry so that I could put it in the spare room overnight, and keeping a keen eye on the cat anytime he was wandering around.

My efforts turned out to be well-founded and we now have another item checked off this to-do list. To store it, I covered the painted area with wax paper and rolled it back up together where it will safely wait for its debut high up in the closet.

I'm not going to make a tutorial for this one since I basically did on the first post, but check there if you're wondering how it all went down (or at this blog which is where I originally got the idea and has a great tutorial).  Basically, print a template, trace it in pencil on the aisle runner, put down wax paper on your work area and paint using acrylic paint (and have a variety of paintbrushes).  And have patience.  I would work in one direction, let it dry and then come back and work on the other side of the outline of letter.

4.  I found this Pinterest user:  Labels @worldlabel.com!  I actually ran across their blog and they share tons of free label templates.  I have had the hardest time finding free vector images and templates like this so it will be a great asset.  They are basically a company that sells printable labels, but they share so much free stuff, it is awesome!

And I guess we'll call it a wrap for this blog post.  If I ever get these wedding invitations finalized then I  can share them!

Do you have any exclamation point-worthy tidbits to share?  Do it!

Sunday, February 10, 2013

Lindsy Plays Florist

I took Monday off from work and had some wedding-related errands that I wanted to run.  My main goal was to get some flowers and with them accomplish a couple of things:

  1. Practice making bouquets
  2. Decide on whether or not we would have flowers at the altar
  3. Practice assembling the floral centerpieces
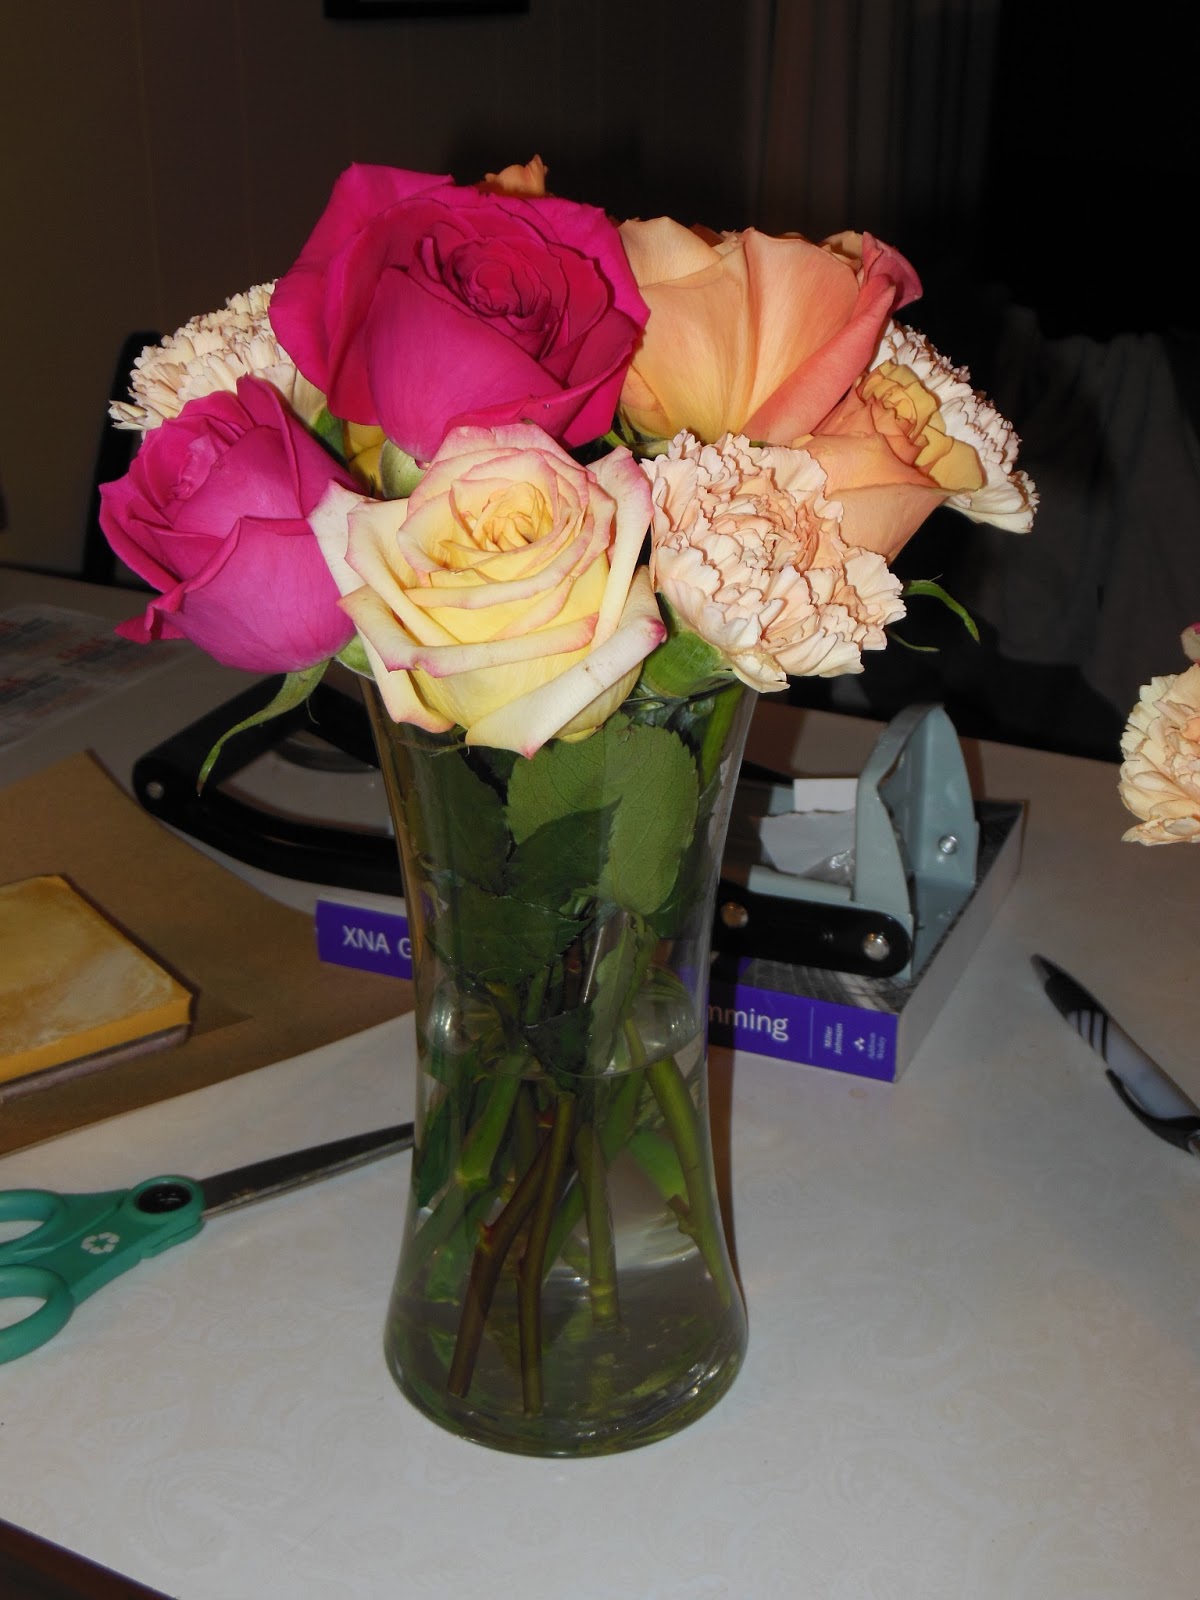
Kistner's, the floral shop that we I chose to do our wedding bouts and corsages, always has $1 roses.  I grabbed a dozen of those and then 8 carnations @ $1.50 for a pre-tax total of $24.00.  They either come in red or assorted, so I picked assorted, and the carnations that just came in were either yellow or peach.  I went with peach.  

Now, our wedding flowers are going to be all white, but I didn't want to pay $3 a rose to get all white when all I was trying to do was some practice.  And honestly, I think $25 is the most I've ever spent on flowers.

Practice Making Bouquets:
I played around with the assortment of flowers to do the bridesmaids bouquets and came up with several numbers to help me decide how many flowers to order (sorry, no pictures...blogger fail):
  • small bouquet = 4 roses / 3 carnations
  • medium bouquet = 8 roses / 5 carnations
  • large bouquet = 12 roses / 6-7 carnations
  • extra large bouquet = 16 roses / 9 carnations
What surprised me the most was that I overestimated the number of carnations needed. I figured it would be equal, but the carnations seem to expand more.  ...And, based off my initial trial, making the bouquets seems like it will be fairly easy (yay!).  I started with 3 flowers in my hand and then just started adding flowers to the outside.  I'll have to maneuver floral tape when I actually do the bouquets, but doing a little practice has given me the confidence to know that it won't be a complete failure!

I plan to order enough flowers to do a large bouquet for each bridesmaid.  I might have to adjust the numbers depending on the flowers, but I plan on ordering some extras anyway.  As for my bouquet, I will have a couple of hydrangea blooms in there too, but I didn't feel like buying them.  I hear they are pretty delicate flowers when it comes to keeping them hydrated, but hopefully they are just as easy to manipulate!


Decide on Whether or Not to Have Flowers at the Altar
I then took the flowers and arranged them into two vases.  

My original vision for the altar was to have two flower arrangements on the sides and then our unity candle in the middle.  After talking to the first florist, she strongly recommended using tall flowers for the altar arrangements because the height of ceiling and the giant stone wall will dwarf the flowers.  While I am not a big fan of some of the typically tall flowers (and didn't want to pay $50 per arrangement), I didn't quite believe her.  I told her that I would check it out and get back to her.  

If you remember, or if not, this is our church:
See the altar up there, hiding behind the piano?

Well, she was right.  Adam and I took the flowers and the unity candle set up to the church last night and they looked sooooo tiny!  Adam and I agreed that it looked much better to be flower-less than to have dinky looking flowers up there at the altar.  So there's a few extra flowers that we don't have to order!


Practice Assembling the Floral Centerpieces
As I've said before, we are having two types of centerpieces:  a 7-piece candle set and then the H-Bowls with flowers.  I'm still hard at work on the candles, but will share them soon!  

The floral centerpieces are going to have the same flowers as my bouquet, a combination of roses, carnations and hydrangea.  Thus, what a perfect opportunity we have to practice these as well!

Based on the shape of the bowl, I figured I might have a hard time arranging the flowers.  The flowers were going to need to be short enough to fit in the bowl, but they might be top-heavy because there would be barely any stem to balance the weight out.  Here's a refresher picture:

I recalled seeing this picture from Martha Stewart/Pinterest awhile back that I thought might help me out:

While I knew that I didn't want to use tape on the bowls (because I wanted the flowers to sit deeper in the glass), it did give me an idea:  chicken wire!

I bought a roll of wire at the hardware store for about $6 and made two templates to try.  I just "traced" my pyrex lids.  The blue one is 6" in diameter and the red one is about 7.5" in diameter.   The red one sat pretty high up on the bowl, so I chose the smaller, blue template.


Gloves are highly recommended!  After cutting two of these, my hands were sore.  After I finished the other 8 (with gloves), I found this pretty little thing:

And then we start arranging!  The wire grating moves around a bit at first, so I started by doing the outside edge and then working my way in.  The stems ended up being only 2-3 inches tall to fit in the bowls (and most certainly top-heavy).   I ended up using a total of 16 flowers:  9 roses and 7 carnations.  Since I will be using hydrangea also, my numbers will end up being different, but at least this way I know the maximum number of flowers that I am going to need!

And the finished product:

I did add some flower petals to the mirror.  Like I've said before, I don't know if I'll dye them blue or punch out paper hearts and spread them around.  Needless to say, I will have to do something, otherwise my guests will be seeing this:
(See the evidence of my wire "helper" in the reflection?)

If you are considering this option, the hardware store also sold green, plastic-coated wire exactly like this.  It was going to be $4 dollars more, and I was being cheap, so I didn't buy it.  I think I would recommend it now, but it's too late for me!

Once I figured out the procedure, arranging the flowers went pretty smoothly.  I think I'll be able to do all 8-10 fairly quickly on the Friday before the wedding (like an hour...we'll time it!).  Adam did give me the official seal of approval on the centerpieces, so we are all set on that!  Hooray progress.

I did take pictures of the bowls as I was arranging them, if you want to see the step-by-step process, it is embedded below in a PowerPoint.

So that is the sum of my $25 floral investment.  I managed to get 3 things checked off my to-do list and there's now a little more room in this head of mine for more wedding stuff!

Did you practice with flowers before your wedding or did you just wing it?  Or...did you have a florist take care of everything like a normal person would?!?!

Wednesday, December 5, 2012

Guest Book Table - Wedding Day Modelogues #1

With our guest book having arrived a few weeks ago, it is now time for the 1st Wedding Day Modelogue blog post!

When we initially started planning this here wedding, we knew we would be doing a lot of DIY.  When we signed our lease contract with the reception hall, the Wareham, they told us that we would be able to use the hall for 4 hours on the day before the wedding (Friday) to set up decorations and such.  HOWever, if someone chooses to book the Wareham the day/night before, then we are out of luck. We can pay $450 to reserve it ourselves for an entire second day, but Mom and I discussed that this summer and she'd rather see that money be spent elsewhere than adding to the reception hall bill.  While I didn't really want to put the burden on my family to help set up decorations on our wedding day, she went ahead and volunteered them for duty.  So in the event that we cannot set up the day before, I needed a way to be organized enough that someone else could follow and recreate my ideas.  Hence, the Modelogues.

The idea behind the Modelogues is for me to set up the decorations (exactly as I want them to look) and take a picture.  I am going to include the pictures in with the materials so that someone can pick up a box that says cake table, open it, and find all the supplies for the table and the "model" picture for the set-up.

The first Modelogue is actually not for the reception, but it is the only table/set-up that I have all the parts to and is actually complete.  Wanting to bask in my productiveness, I went ahead and deemed it good enough for a Modelogue and set it up as desired for the wedding:
Please excuse the snowmen.  They are not welcome at the wedding.  Nowhere in my house did I have a white tablecloth or a white sheet, so I had to improvise.  We are planning on renting our linens from our caterer, so I'll just have to throw one in the box with the other supplies and we are set!


I'm not sure what size of tables the church has, but if they are any bigger than what I have, the guest table might look a little sparse.  I suppose we could throw some paper hearts, rose petals or tealight candles around and that would probably fill it in a bit.


And to store it all, I have been slowly stealing paper ream boxes from work:

...and I added a label and check list that look like this:

I imagine that the check list for each box is going to change, so I wrote the Xs in pencil so that I can move items around but not have to re-write the entire list.  It's a nice way to visually see what you have purchased/still need and also have it organized together.


So what do you think of the 1st Official Wedding Modelogue?  Any opinions on the guest table set-up?  Any other ideas to spruce up the guest book table?

Wednesday, November 21, 2012

Be Our Guest

Our photo/guest book came in last week! After we got the CD of our engagement photos, it was one of the first tasks that I set out to complete.  I decided to use Shutterfly because I got a free photo book voucher from them when I bought my new camera this summer at Best Buy.  I also had in $20 credit from them that I got from David's Bridal when I set up an appointment with them at a bridal show last January.  While there will be a separate post on this later - the $20 Shutterfly cards that you get from David's Bridal and Target will NOT work with any other offers!

Here are a couple of pictures for you.  I was kind of disappointed with how the cover turned out because the design looks kind of dirty (but it doesn't look like that on the website), but everything else turned out well!  If you want to see the entire guest book, I have embedded it below so you can click through it.


As you can see, I tried to leave as much blank space as possible.  Since it is only an 8x8 book, I was really paranoid about running out of space for people to sign.  I figured some will just write their names, but I wanted to make sure that if people wanted to write us a message, that they would be able to do so.  I also was worried that I would leave too much white space and it would feel empty. Ah, the balance!

The default for Shutterfly photo books is 20 pages so I went ahead and expanded it to 29 pages to spread out some of the pictures/leave some pages completely blank.   We decided that we are not going to have a guest book attendant, but I have made a sign that we will place next to the book that tells our guests what to do.  Hopefully they write throughout the entire book, but we'll have to wait and see!

After checking the guest book off the wedding to-do list, I set out to find a pen that would work with the photo paper without smearing.  It would break my heart to find our guest book a big, messy smudge so I did some research on weddingbee.com to see what other brides have done before me.

Most bee's suggested using either a Sharpie or an archival acid-free pen.  I went to Hobby Lobby in search of a pretty Sharpie and found this:

Looks fancy right? Turns out, its no good for our guest book.  It is only a "fine" tip, not an "ultra-fine" tip and it smudges like crazy.  I tried it out on some paper that was similar to our guest book and it was a big fail.

I went ahead and decided to give sharpie another try and bought Sharpie Ultra Fine Tip Permanent Markers and tested it out.  Much better results were achieved this time!  I also gave regular Sharpie Fine Point Permanent Marker a run and you can see the results below.  I wiped my finger over the ink about one second after I finished writing:

The Ultra Fine Tip, middle, definitely wins the smudge wars here.  I don't think it dries automatically, but it is set within a second or two.  Being a left-handed person (and incredibly familiar with smudge-marked hands while writing), this could still potentially cause problems, but we are working in the right direction!  I have heard that Sakura Pigma Micron pens are the way to go, so I might find myself giving them a try just yet.  Apparently they are much more fade-resistant than Sharpies are and come highly recommended on the WeddingBee circuit.

All in all, I am quite pleased with out wedding guest/photo book.  I think it will be fun for our guests to find a place to sign their name or leave us some advice/wishes.  It reminds me of yearbook signing when I was in school which was always fun.

The original price for the book was $29.99 and the extra nine pages were $9.00.
The book was free with my Best Buy code and I also had a 50% off code which made the extra pages only $4.50
Shipping at $7.99 and tax at $1.07 made the total $13.56

Not too bad in my opinion!  While it wasn't technically free like I would have liked, the cost came in equal to a plain photo book and much cheaper than a personalized photo book. And I get to check another to-do off my growing list!

Let me know what you think! Did you do (or are you planning) a photo book for your wedding?  If so, what type of pen did you use?


Check out our full wedding guest/photo book below!

Saturday, October 13, 2012

DIY Unity Candle

When we left off last time, I decided that I was going to design/create my unity candle set this weekend. Well, the internet has spoken the truth and I have some pictures and a tutorial to show you.  In all honesty, this idea came from Pinterest, and specifically A Girl in Paradise's Blog.  Much thanks goes out to her and this idea because it turned out great!

Materials:

Candles
Tissue paper
Printer paper
Scotch tape
Printer
Hair dryer
Wax paper


Instructions:
1.  I made my templates using Microsoft Word.  I tried out several designs that I liked and had Adam pick his favorite. He said he didn't care, but if he did, then he would pick #2. Thus, #2 it was.


2. I printed it out a couple of times to make sure it fit my candle appropriately.  Our names were too big the first couple of times so I had to condense them down a bit.

3.  Then I took a piece of tissue paper and taped in onto a piece of printer paper.  I tried to smooth it out as much as possible, but there were still a few wrinkles.  I also made sure the edges of the tape were smooth so that I wouldn't jam my printer.

4.  I crossed my fingers, pushed print and sent the paper through the printer.  Success!

5.  I roughly cut out the shape, separated the tissue paper from the printer paper and then cut around the shape as closely as possible.

6.  I positioned the tissue paper onto the candle.  I was a little worried because there was such a color contrast between the candle and the paper, but it goes away after step 8.

7.  I wrapped a piece of wax paper around the candle (with the waxy side touching the candle).  I tore a big enough piece that I had some extra to hold on to at the back of the candle.

8.  Using a hair dryer, I heated up the candle.  I went over the design (back-and-forth, up-and-down) quite a bit to make sure that it was heating evenly.  It does get a little toasty on your hands!  Some people have mentioned that their candles started to drip, but mine never did that.  It might be because I was using a hair dryer rather than a heating tool or that they heated their candle longer than I did.  I probably heated it for 45 seconds and then peeled the wax paper off of the candle.

9.  Once you peel off the wax paper, your tissue paper should have melted into the candle and it should be difficult to see the lines of your design.  If it didn't melt right, you can always put the wax paper back on and heat it again to get your desired results!


To get the official look, I dug out the candle holder that I got at Goodwill for $2.50 and put it all together.  The lighting/glare in my house is terrible, but I'm really happy with how it turned out!  It is simple (which is what I wanted) and turned out better than to be expected.  The only thing that I'm thinking about doing is adding an "L" to the left tapered candle and an "A" to the right one.


Total Cost:
Candle holder:  $2.50
Pillar Candle: $5.99 (Wal-mart)
Tapered Candles: $1.50 (.75 ea at Wal-mart)
Tissue paper, printer paper, ink, and tape:  on hand
Before Tax: $9.99

Considering that you can spend $20 on a plain candle set at Hobby Lobby, I am incredibly happy with out $10 unity candle set and holder, and ours is personalized! I'm thinking that I will make a memorial candle in the same fashion to place somewhere at our reception.  My grandmother passed away 3 years ago and was a big part of my life and I think this would be a nice way to remember her.  Adam has a ton of family members that have passed and I think his parents would appreciate the gesture.

So what do you think?  Would you add something extra or leave it as it is?  Did you/are you planning on having a unity candle at your wedding?