Thursday, April 18, 2013

The Post about Wedding Napkins

Originally, I was going to make personalized napkins:  

I felt that $30 for 100 napkins was just plain silly.  I can buy the napkins for $5 and do it myself for half the cost.  I already had the heat gun, I just needed to find the right stamp, ink and embossing powder.   

Well, change of plans!  Theknot.com was having a sale, $10 for 100 personalized napkins.  So I got 3 sets.  And yes, I spent $30 on napkins (which was what I originally was trying to avoid in the first place), but lemme explain:  
I was only going to get 2 sets of 100.  Okay, $20.  Well, shipping ended up being about $8, so $28.  But The Knot was offering Free Shipping on orders of $25+.  So instead of spending $28 on 200 napkins, I spent $30 on 300 napkins and slept just fine that night.

Could I have done it for less?  Yes.
Did I feel like saving a little money was worth the time it would take to make them myself (plus the cost of the extra supplies)?  Not so much. 
Do I regret having to cross something off my DIY list that I did not DIY? Nope.

So thus we have our napkins in 3 different colors and designs:

Overall, I was really happy with my purchase.  The quality was great, the price was unbeatable and the amount of work involved was minimal.  I had read some reviews saying that some of the napkins had stuck together and didn't get printed on, but they actually sent around 110 napkins in each box and I only had 5 napkins that I won't be using:

My only complaint:  it took over a month from the time I purchased them to the time that they shipped.  Wowsers.  Don't wait until the last minute for these guys!  And don't forget to sign up for their emails so that you can get in on these deals!

Monday, April 15, 2013

Prom: Round #7

Holy Heavens, it's been awhile.  The last 3 weeks I have been putting in long hours at work to accomplish this:

Oh, Prom.  I only went once in high school.  This year marks the sixth time I've gone in my adult life.  

Working in a small high school, I am the Junior Class Sponsor.  Our theme this year was "Enchanted Evening," and boy was it enchanting.  In years past, we have decorated the ceiling using tulle or gossamer, but this year we thought a balloon ceiling would be something new and unique.  I bought a net and we filled it with balloons.  It wasn't without flaw, but it was definitely cheaper than filling those 1200 balloons with helium.

What is really wedding-relevant about this post is:
1.  After 5 years, it has taught me a lot about planning events.  This particular celebration seated 80 students whereas our wedding will be more like 125.  For our wedding reception we won't be spending time and money to decorate the walls or have the large theme items, but we also won't get the Friday before to decorate.   Most importantly, I've found that the more thorough my check lists are, the more efficient my helpers could be to find something to work on.

2. Flowers!  I had been planning on buying our flowers from Sam's Club for the wedding.  I have been reading the reviews and everyone had seemed to have positive experiences.  So, I decided to give it a trial run with the prom flowers (use someone else's money, right?).  I let my Prom Committee pick what type/color they wanted from their website and they chose red and white carnations.  They were $52.98 for 100 stems (the price has gone up a little since), so for $106 we got 200 carnation stems with free shipping.
 
They get shipped overnight and are dried/closed up.  I had them delivered on Wednesday since I figured that carnations last a long time and it would give them an extra day or so to bloom.  As soon as they arrive, you have to cut the stems and then hydrate them in water/plant food mix.  I borrowed buckets from the school to store them in, but 100 stems per bucket did get a little crowded.  They started blooming quick (especially in my 80 degree classroom) and the white ones were full by the end of the afternoon.  On Friday, I changed the water and arranged them in our vases.  We only needed enough to fill 8 vases/centerpieces, but we ended up having enough to fill 5 extra vases.
The whole experience was incredibly easy.  I purchased them almost a month in advance online and picked my shipping date. They bloomed well, I didn't have a single broken stem and they were cheaper than any florist I talked with in town.  Thus, I'm super excited to order our wedding flowers from Sam's Club now.  Adam and I went and got a membership about a month ago to buy the alcohol for the wedding, so this is another way our membership is paying off.  Also, if you have a college/university student I.D., make sure to show it when signing up - they give you a $15 gift card to offset the $40 membership price!

Arranging the flowers gave me another round of practice for the wedding as well.  At this point, I feel pretty comfortable knowing that I can make the bouquets and centerpieces in a few hours time without too much drama.


And now it's back to my normal life.  I took today off work and slept half of it away.  I made a spreadsheet of all the hours that we put into Prom.  I worked an extra 50 hours over the past 3 weeks and all together we put in almost 300 hours.  Wow.  It's probably a good thing I haven't made a spreadsheet of all the hours I've contributed to wedding planning!

Saturday, March 23, 2013

Good News, Everyone!

Today, on the blogging menu, we have lots of random tidbits. Each one is followed with an exclamation point as there is definitely some exciting-ness going on.

1.  On Tuesday, we hit 10,000 page views!
When I first started this blog, I wondered if I would even hit 100.  There was no particular number goal, as this blog just serves as an outlet for me to talk solely about wedding-related things, but it's cool to see that my posts are being read and hopefully helping someone out in Webland.


2.  Yesterday was the 3-month mark until the wedding!  It's crazy to think that June is only 3 months away, but I better get used to it!

Since this week is Spring Break for me, I went to the District Court's office on Monday and applied for our wedding license.   I don't know if it's the same in other states, but I went back on Friday to pick it up after our 3-day waiting period.
This was something that really let sink in the fact that the wedding is only getting closer and closer.  The clerk in the office started telling me what to do in regards to name-changing, which I AM doing, and I started to understand how big of a task that is going to be post-wedding.  I googled it when I got home, and holy cow, my name is on a lot of stuff.  That should be a no-brainer, but it starts to add up:  social security, work, insurance, driver's license, utility bills, bank accounts and credit cards, email, passport, voter registration, doctors, my teaching license, car/home registration, etc.  Thank goodness I have the summer off!  I'll also be curious to see how my students deal with it when we get back to school.  I mean, I do teach high schoolers so they are perfectly capable of calling me something new, but some of these kids I've taught for 1-3 years so it might be an interesting adjustment for them.


3.  I managed to complete our aisle runner!
(The C is blue, but the picture makes in kind of hard to tell)

I started this project last summer, but my cat decided to cuddle with it and subsequently tore it all up.  I managed to salvage the part that I painted and decided that we would use it on the cake table: 

At that point, I was sick of painting and put all my supplies away (and the remainder of the aisle runner up high and out of kitty reach).  I decided to tackle the project again about a month ago when we had a slew of snow days.  Adam and I went over to the church and measured the length of the aisle to make sure that we had enough fabric left, decided where we wanted the logo to be positioned (it's going to be up by where we stand), and then cut it to size.  This time I was extra careful:  locking the cat away in the other room if I was going to leave the house for a little, making sure it had enough time to dry so that I could put it in the spare room overnight, and keeping a keen eye on the cat anytime he was wandering around.

My efforts turned out to be well-founded and we now have another item checked off this to-do list. To store it, I covered the painted area with wax paper and rolled it back up together where it will safely wait for its debut high up in the closet.

I'm not going to make a tutorial for this one since I basically did on the first post, but check there if you're wondering how it all went down (or at this blog which is where I originally got the idea and has a great tutorial).  Basically, print a template, trace it in pencil on the aisle runner, put down wax paper on your work area and paint using acrylic paint (and have a variety of paintbrushes).  And have patience.  I would work in one direction, let it dry and then come back and work on the other side of the outline of letter.

4.  I found this Pinterest user:  Labels @worldlabel.com!  I actually ran across their blog and they share tons of free label templates.  I have had the hardest time finding free vector images and templates like this so it will be a great asset.  They are basically a company that sells printable labels, but they share so much free stuff, it is awesome!

And I guess we'll call it a wrap for this blog post.  If I ever get these wedding invitations finalized then I  can share them!

Do you have any exclamation point-worthy tidbits to share?  Do it!

Monday, March 18, 2013

Playing Games

I was really planning on a 100-Day Post, but as you can see, I failed.

Whoops.

With that being said, the 96-Day Post is about...playing cards!

I have always loved the concept of games at the wedding reception.  I believe that it really portrays how the couple wants their guests to be entertained, whether they are waiting for the bridal party to arrive, or just enjoying the lull between main events. I think it demonstrates a little bit of extra thought, and hopefully, keeps guests entertained for a few more minutes.

While I really didn't want to take up the space to create a board games table, I thought it would be neat to incorporate the idea throughout the wedding.  On our programs, I plan on having some sort of game - a crossword or song guessing game (based on the string versions of some of our favorite songs).  For our dinner menus, I have designed a Sudoku puzzle and a word search on the backside. With those two elements, I thought playing cards would be another great addition.  Rather than create a set for each table, I decided that I would keep them stored at the bar so people could grab them if they come up for a drink and need something to do.  

While I could have just grabbed some decks of cards and threw them up on the bar, I decided that we really needed cute boxes with our names on them. Hence...


All in all, it was quite an easy project.  You just need some thick paper, scissors, sticky tape, a scoring board and some playing cards.


1.  Take an existing deck of cards, unfold it, and trace the deck as a template on the paper.

2.  Cut out the deck on the lines you drew

3. Score the lines based on where the folds of the deck box are.

4. Tape the main edges together and fold in the flaps

5. Insert cards and add any decorative elements

 I only made 10 sets, so hopefully that is enough! It was a little time-consuming, but I think they turned out acceptable enough to consider using my spare time to complete them.  I used extra paper left over from my invitations (post coming soon...really!) and then used the free seals that I bought from Vistaprint when we ordered our Save-the-Dates. I bought the cards at Dollar Tree and they came in packs of 2 for $1.  Needless to say, I spent about $5 on 10 decks of cards and potential entertainment for 10 groups of people. Hooray!

Sunday, March 10, 2013

I'd Dye For You

A little shout out to the great Bryan Adams.

I think we've found my first project that I'm actually giving up on.  We've had some bumps in the road thus far, but dyeing flower petals is the first official Failure with a capital F.

I found this tutorial from the Dollar Tree website awhile back.  I knew that I was going to want to dye them a dark color, so I was a little skeptical of how well it would work.  But after looking at the picture below (from their website), I figured that since the purple was pretty dark, I surely could do dark blue too.

The Process
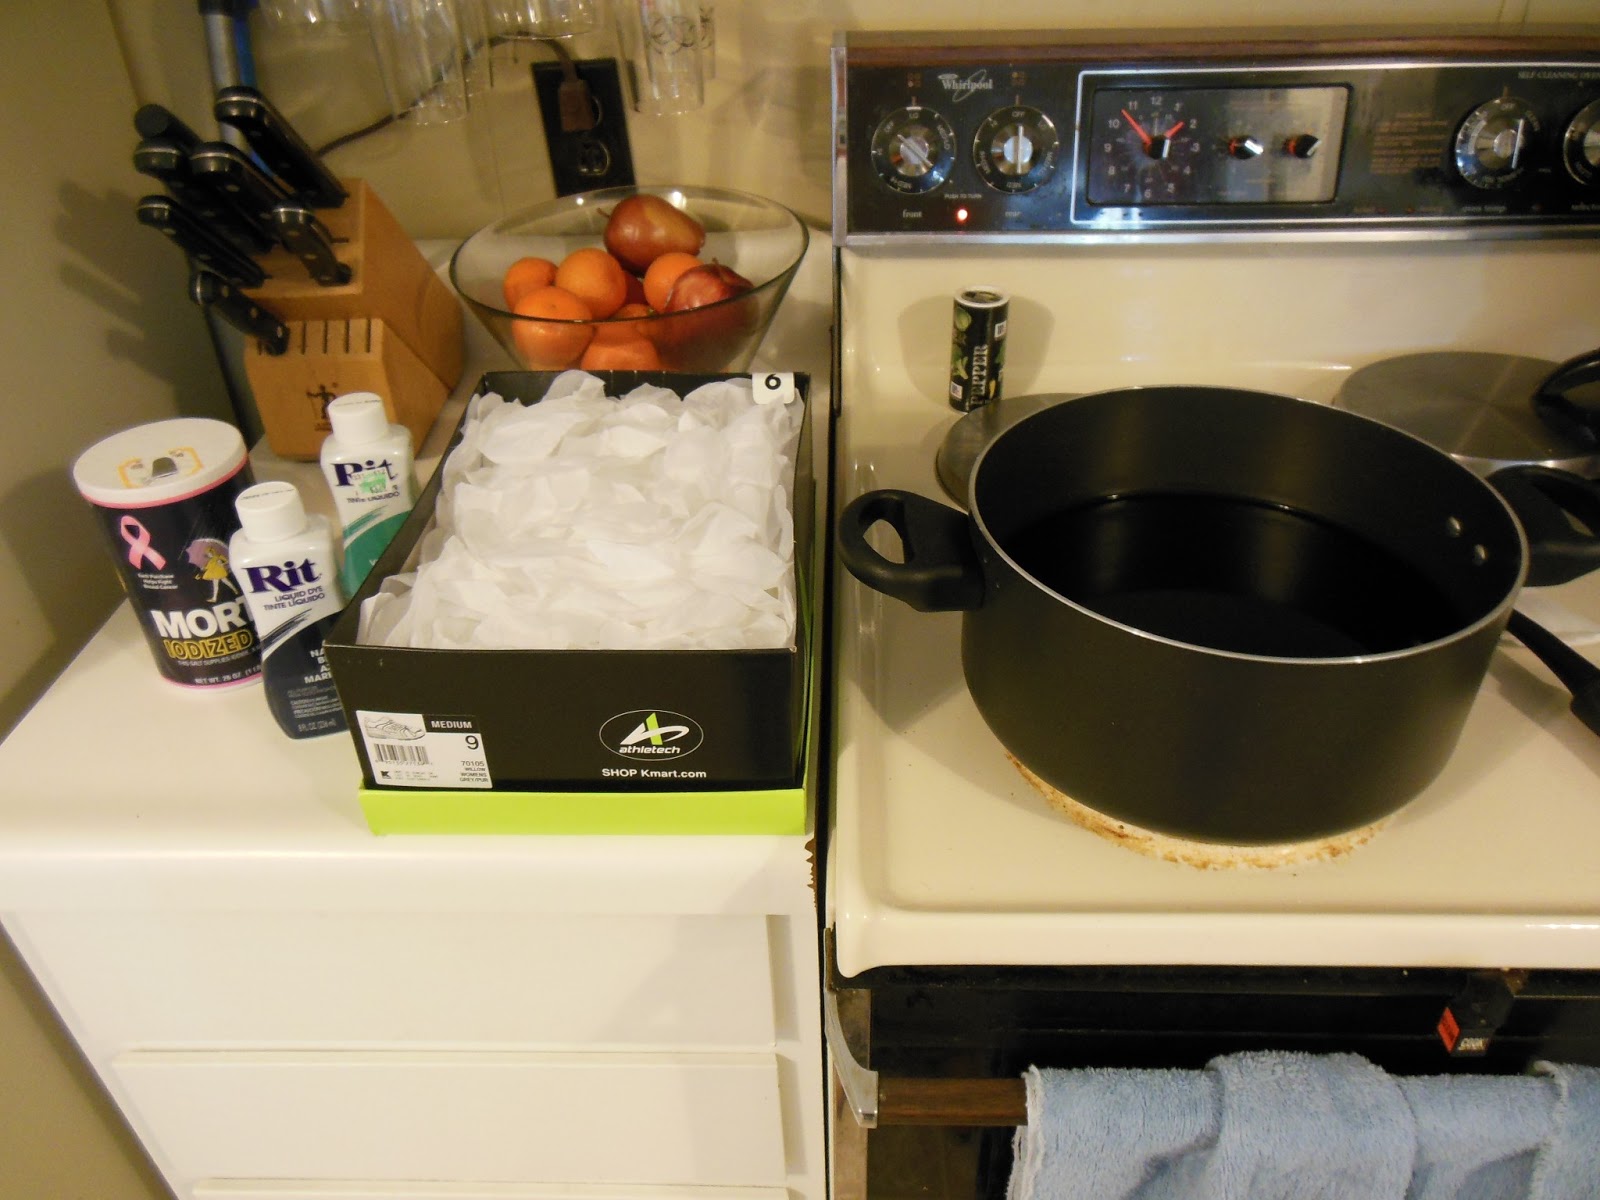
1.  I bought 5 packs of flower petals from Dollar Tree ($5) and Rit Liquid Dye in both Navy Blue and Teal ($6ish).  Since our color isn't exactly Navy, I thought the teal might provide a little bit of green into the mix.  I thought about dyeing the petals teal first, letting them dry and then re-dyeing them navy, but I scratched that idea and just mixed the two colors together.  That could be the reason that this process failed, but in all honesty, I really think it is the type of fabric of the petals that inhibited the whole process. 

2.  I put 2 quarts of water in a pot, added 4oz of each color of dye and 1/4 cup of salt.  I heated the mixture on Low for 5 minutes before adding in the flower petals.  I bought WAY more flower petals than I could fit in the pot, so I just added enough that they were still fully immersed in the dye.

3.  And let simmer covered on low for 3-6 hours.  I stirred the petals about once per hour.  After 6 hours, the flower petals still weren't the right color, so I kept them on even longer.  I actually took some of the petals out, rinsed them and let them dry.  Hoping that they needed a second round of dye, I put them back in the dye (but it didn't make a difference).

4.  At bedtime, after the petals had been simmering about 9-10 hours, I decided to to call it quits.  I rinsed the petals and set them out on an old towel to dry.  I wasn't very happy with the color, but thought I'd sleep on it (and that they might magically change color overnight).  

5.  By morning, I had the same lavender-blue flower petals that resembled neither the navy blue or the teal dye that I had used.  I got out my peacock color swatch to compare the differences between our actual color and promptly decided that it was "unacceptable" (with a snobby British accent).  I didn't have much hope for trying to dye the petals a second time, so the project was officially crossed off the to-do list.

If you recall, I was going to use the flower petals to decorate around our centerpieces.  I had been playing around with either using the flower petals or paper punched hearts.  

So I guess we'll be using the hearts instead!  I'm actually okay with this because it means I get to pick out fun paper that matches our color scheme!  Here's a quick example using some of the paper samples I ordered in search for our invitation paper (post coming soon on that!)

So there it is.  My big Failure.  If anyone would like my lavender-blue flower petals, feel free to message me and I'll send them to you!  

Thankfully, I only wasted about $10.  What were your crafting/wedding failures?

Tuesday, February 26, 2013

The Candle-Making

I'd like to think that wedding planning had made me smarter and more knowledgable. I used science(!) to cut the glass bottles and then we were off to explore candle-making territory.  

I did some reading online and decided that I wanted to use soy wax.  They say it burns cleaner and is a slower burning wax than other types.  Ok.

Then I read about candle wicks.  I had no idea that there were different types of wick sizes and materials. I found the website, CandleScience, that had a Wick Guide.  It asked for the diameter of my glass and then it suggested what wicks to use.  I chose ECO-6 6" Pretabbed Wicks.  

The first thing that I needed to do upon commencing the candle-making, was to do a burn test.  Since these are going to be used for our reception, I wanted to make sure that it would stay lit for the entire 6ish hours.  You also want the wax to melt all the way to the edges after about two hours.  If it doesn't do that, then basically you need a different wick size.

The shortest glass size was the one that concerned me the most. I made two of those, lit them and took notes for the next six hours.  Thankfully, the candle burned well and was still lit 6 hours later.  I deemed the test run successful and set off to mass produce candles.


1.  I started off with my 56 pre-cut glasses:

2.  I took each wick tab and placed a glue dot on the bottom of it.  I then centered the wick tab in each of the glasses and pressed down hard.

3.  Now, you'll need something to steady the wick once you pour the wax in it.  You can buy wick holders, but I was too cheap for that.  I rubber banded markers together and sandwiched the wick in between them.  It wasn't perfect, but it did the job fairly well.

4.  Now it's time to heat the wax.  I used a Presto Electric Fryer and turned the temperature to 200 degrees (which is the lowest besides "warm").  I heated it just long enough for all of the wax chips to melt (about 175 degrees). 


5.  Once it was all melted, I poured the wax into a metal pitcher and kept my thermometer in the pitcher.  You want the wax to cool to 135-145 degrees before you pour it into the glasses.  It has something to do with the cooling/setting of the candles...sure.

6.  Once it's cool enough, pour!  I highly suggest laying down newspaper wherever you're working.  Soy wax cleans up super easy if it's wet, but it only gets more difficult the cooler it becomes.  It took about an hour for the wax to harden all the way to the top.  The glasses were still warm, so I let them cooler for several more hours before moving them around.

7.  And after you've poured 40 of these, ran out of wax and had to wait for 10 pounds more to be shipped, and made the last 16, you have centerpieces that look something like this:
I haven't quite decided on the arrangement here yet.  They're both clearly very similar and this is quite a trivial thing to spend brain cells on, but these are my two winning options.


And now we're officially done with centerpieces!  Hooray!


Overall, this was a seemingly a never-ending task that took the span of several weeks. I would heat eight cups of wax up at a time which would make about one complete centerpiece with seven candles.  Waiting on the wax to be cool enough was the big time consumer.  Also, some of my candles turned out with some problems which meant that I had to get the heat gun out and melt the entire top of the candle so that it could re-set smooth. 

I'm glad that I embarked on this candle-making, glass-cutting journey, but I must say that I'm even happier to be done with it.  Now I can focus on getting those durn invitations started on! 

Saturday, February 23, 2013

Glass Cutting: The Tutorial

We left off last time going through my trials and errors in the field of glass cutting.  Here is my official tutorial for what worked best for me.  I know a lot of people have had success with the other methods, but apparently not this girl.

Materials:
Glass bottles - I used clear bottles, but any type (beer, wine, salsa, etc) will do
Generation Green Bottle Cutter (don't forget your 40% coupon!)
Sandpaper (150 grit was the coarsest I would use)
String (for template)
Electric Hot Pot
WD-40

1.  I let the glass bottles soak in hot, soapy water for about 10 minutes to clean off the labels/glue.  I had Newcastle, Mike's Hard Lemonade and Jack Daniel's Cocktail bottles.  Newcastle labels came off super easy.  Mike's required quite a little bit of scrubbing.

2.  Since I was going for a staggered look, the first thing I needed to do before cutting was to make a template to determine the height of the different cuts.  I had previously played with the bottle arrangement and decided that I was going to use 7 glasses per centerpiece.  I took some string and tied seven pieces on the template, arranging and spacing them as desired.

3.  I got out the glass cutter and lined up the scorer part(that green handle towards the bottom) up with the string on my template.  You'll see that green piece goes in the bottle neck and stays pretty snug to help keep your score line steady.

4.  Apply pressure to the top green piece and the lower handle and rotate the bottle 360 degrees to get a complete score line.
See the snow in the background? 7 inches and counting (that's a lot for KS)!

5.  Now that you have a score line, heat up your hot pot until you have boiling water.  You are first going to pour the boiling water over the entire score line, rotating the bottle as necessary.  Have cold water running from the faucet at the same time.  After you have poured boiling water on the score for about 10-15 seconds, do the same under the cold water.  The change in temperature, the thermal shock, will cause the bottle to break at that score line.  You will see it almost immediately once cold water hits it.  If if doesn't break entirely, alternate by pouring more hot water and then cold water on the line.  Here is a quick, un-edited video if you want to see it in action:

6.  And there you have two pieces with a pretty decent cut!  You will want to sand the edges of the pieces you are going to use.  I got the sand paper a little wet (to avoid dust/glass shards) and sanded parallel to the cut and then on the inside and outside edges too.  It helped to give it a more rounded, finished look and eliminated some of the tiny imperfections.   It also will prevent someone from taking a trip to the hospital to get stitches!  

7.  And repeat.  55+ times.    After about every three cuts, I would apply a tiny dab of WD-40 to the scoring wheel.  It was recommended in the instructions and seemed to help maintain the scorer.  The bottle cutter comes with several (like 5-6) wheels, but I used the same one for all the glasses.


Overall, it wasn't a flawless method, but things turned out dramatically better than any of the other methods that I had tried.  I still had many bottles that didn't turn out as perfectly as I would have liked, so each time I would scrap it and have to try again.  If you do have larger imperfections, you might be able to sand them out, but you will definitely be sanding for awhile!  Since I had 50 bottles to sand, I had high standards, hence the giant box of glass that will be going to the recycling:

As for glass cutting, that's all!  Next time, in the continuing saga of DIY Candle Centerpieces, I'll share my candle making experiences...joy!

Has anyone out there tried glass cutting?  Are you thinking about it now?  I am going to be making so many Christmas presents next year this way.  Think about all the cool bottles out there:  vases and candles galore!